When using a laser, material is burned, producing unpleasant odors and smoke. To safely operate a laser, a proper exhaust system is essential. This article explains the key aspects of a laser exhaust system and provides instructions for building your own DIY Laser Exhaust System.
Why Do You Need an Exhaust System for Lasers?
The laser’s focal point concentrates so much energy that the material burns and turns into gas. The resulting smoke contains dirt particles and, depending on the material, highly toxic and carcinogenic gases, such as hydrogen cyanide from burning synthetic leather. These gases must be efficiently extracted from the laser’s workspace for your health and the longevity of your laser. The smoke can contain harmful substances that settle on mechanical parts, with some even chemically corroding metal components, such as chlorides.
Additionally, the dirt particles in the smoke can accumulate inside the laser. If these particles settle on mirrors or lenses, the laser’s performance will decrease, potentially leading to damage. If the dirt on the lens or mirrors is locally burned by the laser, it can cause clouding. Over time, the laser’s energy won’t pass through the lens, creating heat that may crack or destroy it. Therefore, it’s crucial to regularly inspect and clean the lenses and mirrors.
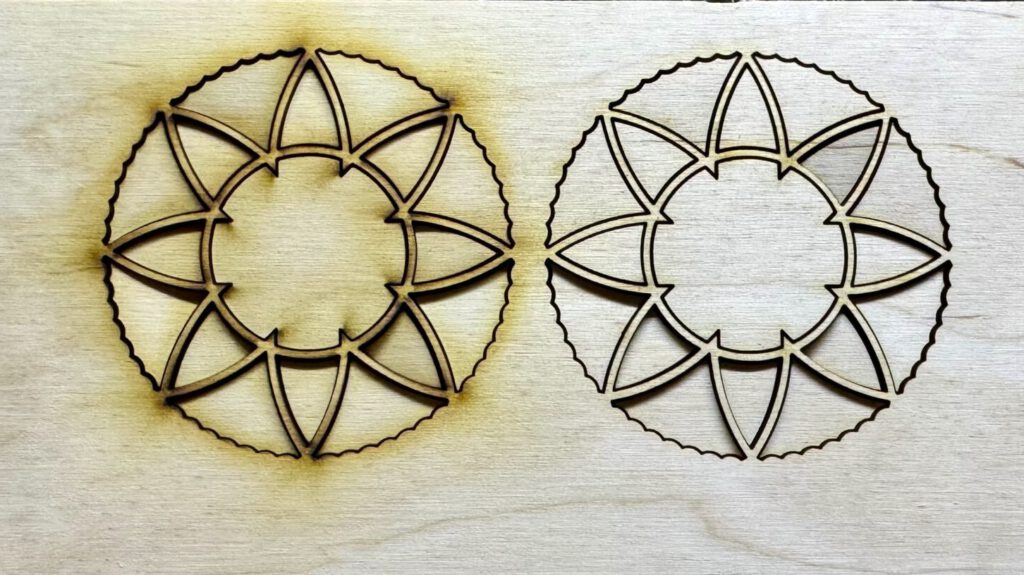
Another reason for having an exhaust system is to prevent scorch marks—unsightly deposits that occur when smoke settles on the workpiece. A good laser exhaust system efficiently removes the smoke so it doesn’t come into contact with the material as it exits the workspace. For more information on avoiding scorch marks, check out the article Avoiding Smoke Marks in Laser Engraving – Tips for Laser Cutting and Laser Engraving on Wood
How Does a Laser Exhaust System Work?
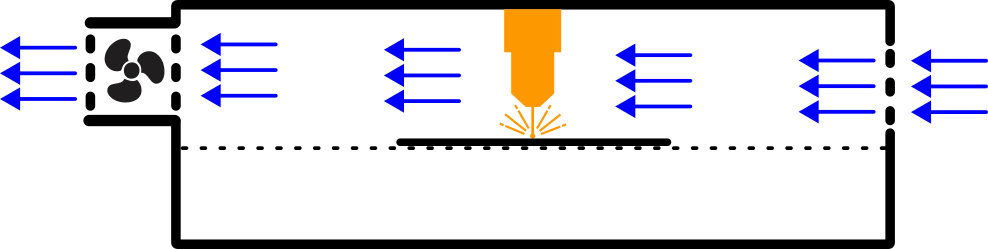
A good laser exhaust system quickly and efficiently removes smoke from the workspace. This means a constant airflow must pass through the entire workspace without creating turbulence.
Where air is extracted, there must be sufficient air intake to prevent the exhaust system from working against a vacuum. You’ll notice this problem if the smoke in your laser moves very slowly or not at all toward the exhaust outlet. Every enclosure must have both an air intake and an air outlet, which is especially important for DIY laser enclosures and tents for diode lasers.
Enclosures with Exhaust Systems for Diode Lasers
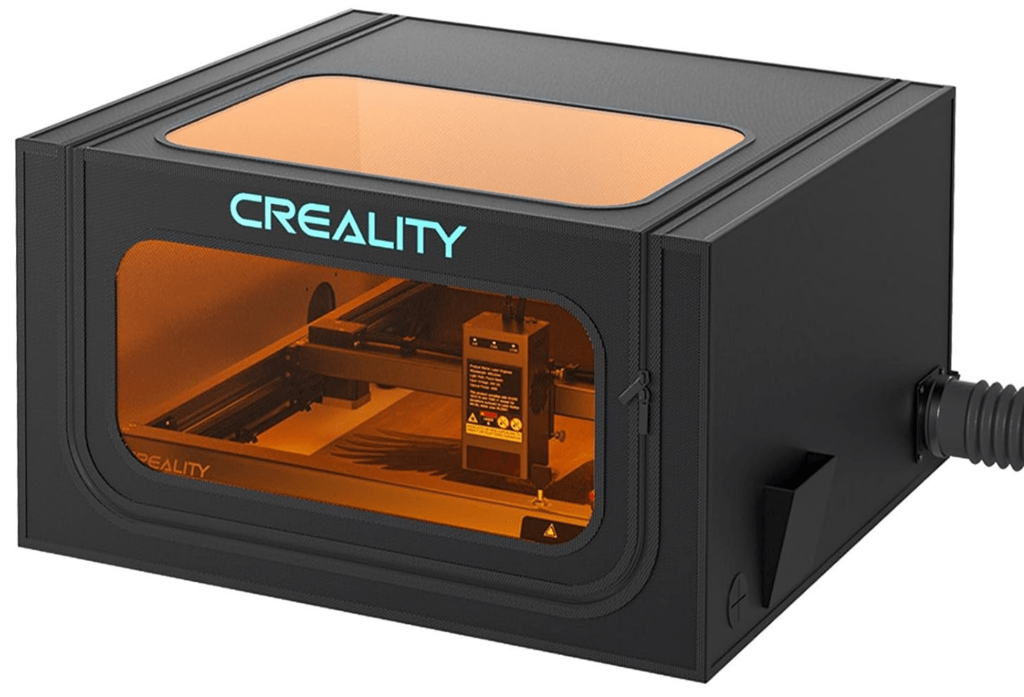
Many enclosures for diode lasers have air intakes that are either too small or poorly positioned, preventing proper airflow through the workspace. For example, the Laser Engraver Enclosure 2.0 from Creality (Amazon)* places the air intake right next to the exhaust hose. A better design would position the air intake opposite the exhaust to ensure airflow moves across the entire enclosure, carrying the smoke with it.
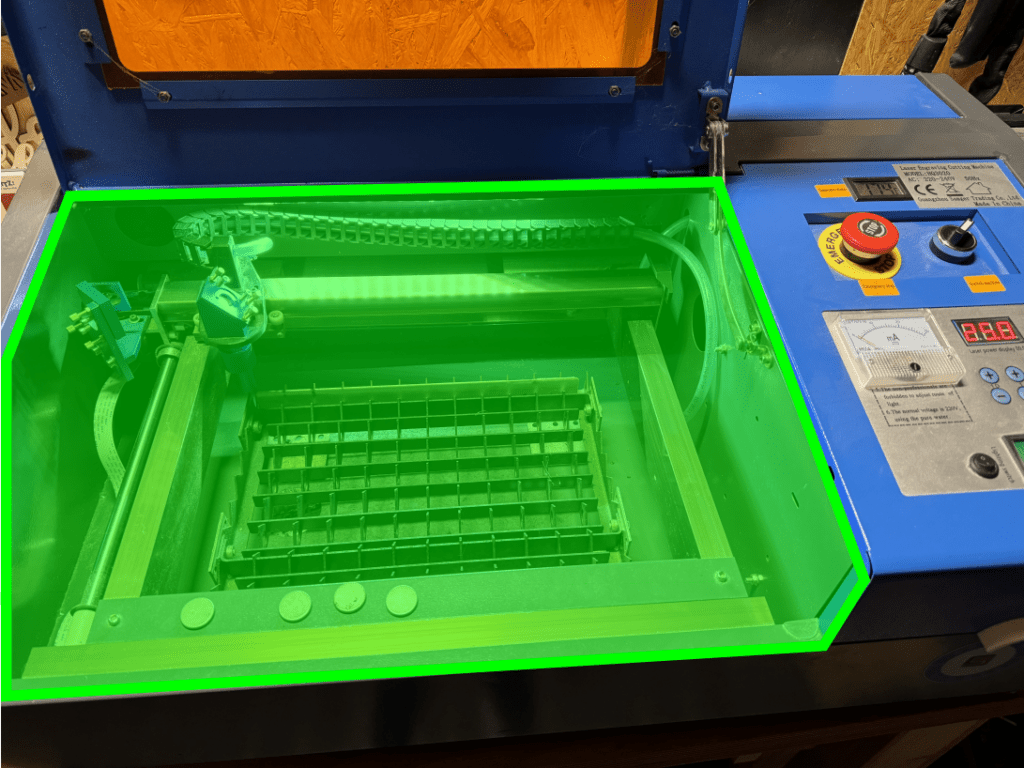
Enclosures with Exhaust Systems for CO₂ Lasers
Enclosures for common CO₂ lasers from brands like Omtech* and Vevor* typically have open slots and holes, making them less airtight. This allows sufficient airflow but doesn’t ensure optimal airflow across the workspace. A better setup directs air intake from one side and exhausts it from the opposite side, creating a consistent cross-flow.
How Much Airflow Does Your Laser Exhaust Need?
To effectively remove smoke from the workspace, your laser exhaust system must provide sufficient airflow. As a rule of thumb:
For the workspace volume, only the laser’s working area is considered. Separate compartments for electronics are excluded. For instance, a K40 laser has a workspace of approximately 50 liters. An exhaust fan rated at 50 m³/h would exchange the air in the workspace every 3.6 seconds.
Laser Exhaust System Table
Here’s a quick reference table for common CO₂ lasers. The listed values are guidelines, and you can always choose a more powerful exhaust system if sufficient air intake is ensured.
| Laser Type | Workspace [mm] | Airflow [m³/h] | Duct Diameter [mm] | Product Recommendation |
| 40W | 300×200 | 50-150 | 100 | 100mm Inlin Duct Fan (Amazon*) |
| 50W | 500×300 | 350-400 | 100-150 | 150mm Inline Duct Fan (Amazon*) |
| 60W | 600×400 | 500-600 | 150 | 150mm Inline Duct Fan (Amazon*) |
| 80W | 700×500 | 600-750 | 200 | 200mm Inline Duct Fan (Amazon*) |
| 100W | 900×600 | 1.200-1.500 | 200 | 200mm Inline Duct Fan (Amazon*) |
| 130W | 1.400×900 | 2.000-2.500 | 2 x 200 | 2x 200mm Inline Duct Fan (Amazon*) |
| 150W | 1.600×1.000 | 2.500-3.000 | 2 x 200 | 2x 200mm Inline Duct Fan (Amazon*) |
Building Your Own Laser Exhaust System
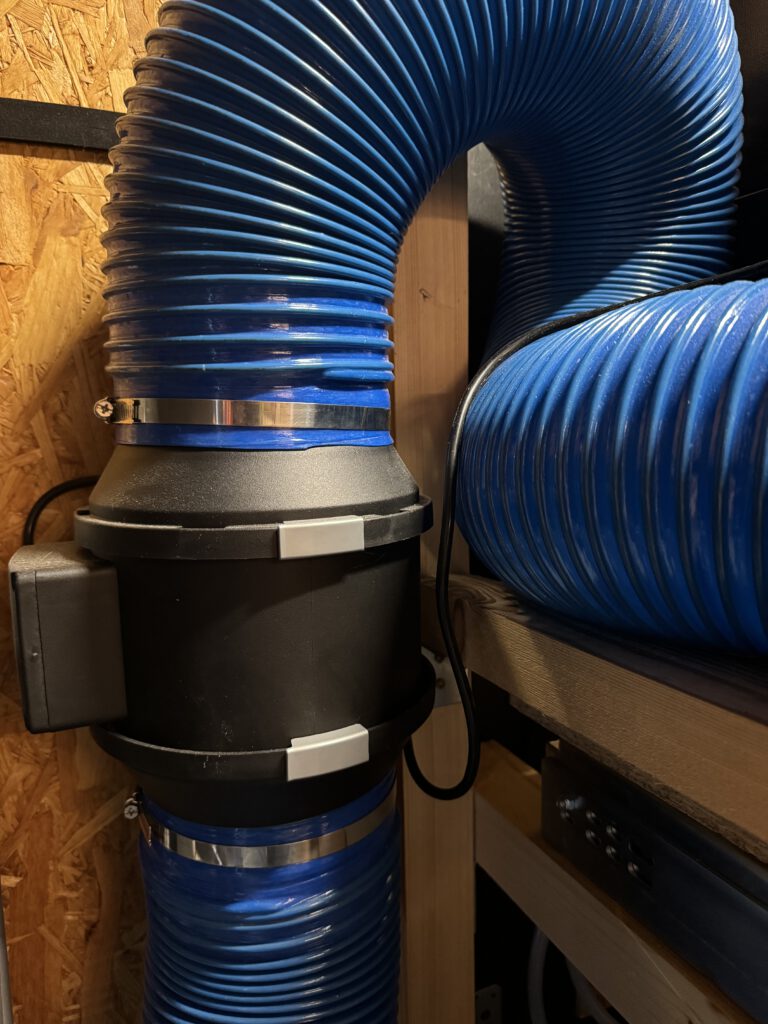
Building your own laser exhaust system is straightforward and takes no more than 30 minutes.
You’ll need:
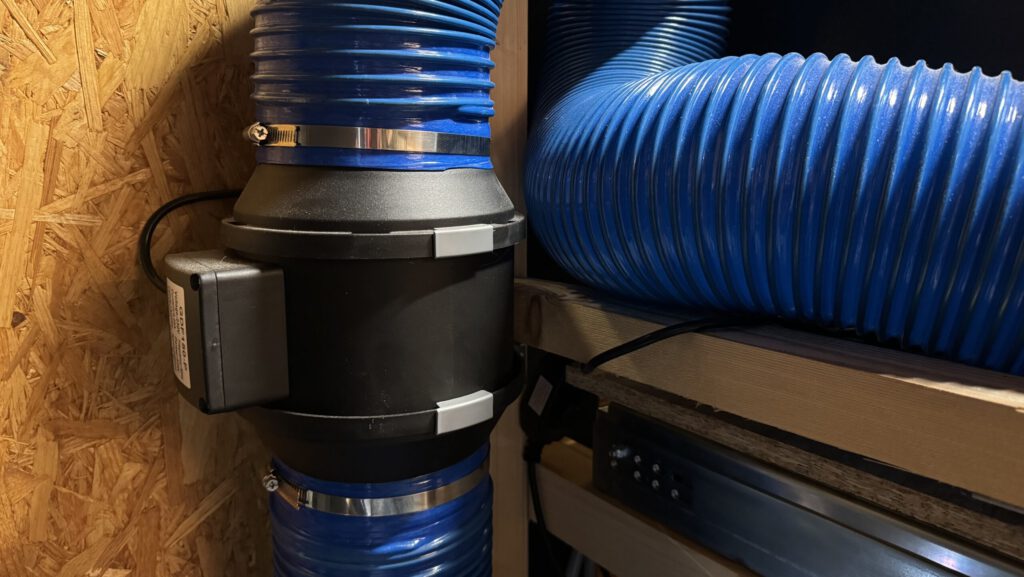
- 1x inline duct fan (see table above)
- 2x exhaust hoses (Amazon*)
- 4x hose clamps (Amazon*)
- Optional: Adapter fittings
Steps:
- Connect the second hose to the other side of the fan and route it outside (e.g., through a window).
- Measure the diameter of your laser’s exhaust port and get a matching exhaust hose. Ensure the hose is airtight and durable, avoiding permeable materials like some dryer or AC hoses.
- If your laser already has a fan at the exhaust port, remove it. Multiple fans in a single duct can create resistance and reduce efficiency.
- Attach the first exhaust hose to the laser and the duct fan, ensuring the airflow direction matches the fan’s arrow. Secure the connections with hose clamps.
- If the hose and fan have different diameters, use an adapter. 3D-printed adapters are a cost-effective option, with models available on Thingiverse and Printables.
ADVERTISEMENT: The links marked with an asterisk (*) are affiliate links. If you click on such a link and make a purchase on the destination page, we receive a referral commission from the respective provider or online store. This helps us cover our costs (e.g., web hosting). There are no additional costs or price disadvantages for you when purchasing.
Pingback: Hidden Costs When Buying a Laser – What You Need to Know - laser-crafting