Adjusting Laser Focus is essential for achieving precise engravings and clean cuts, whether you’re using a CO₂ or diode laser. The focal point is where the laser beam converges to its smallest diameter, delivering maximum energy density. A properly adjusted focus ensures sharp engraving details and effective cutting, while even a slight misalignment can result in blurry engravings or incomplete cuts. In this article, we’ll explore three simple methods to adjust laser focus: the ramp test, the Lightburn focus test, and the convenience of automatic focus systems. These techniques will help you optimize your laser’s performance and achieve professional results every time.
Why is the Focal Point on a Laser So Important?
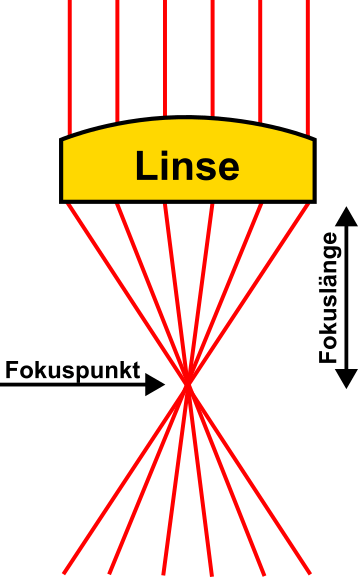
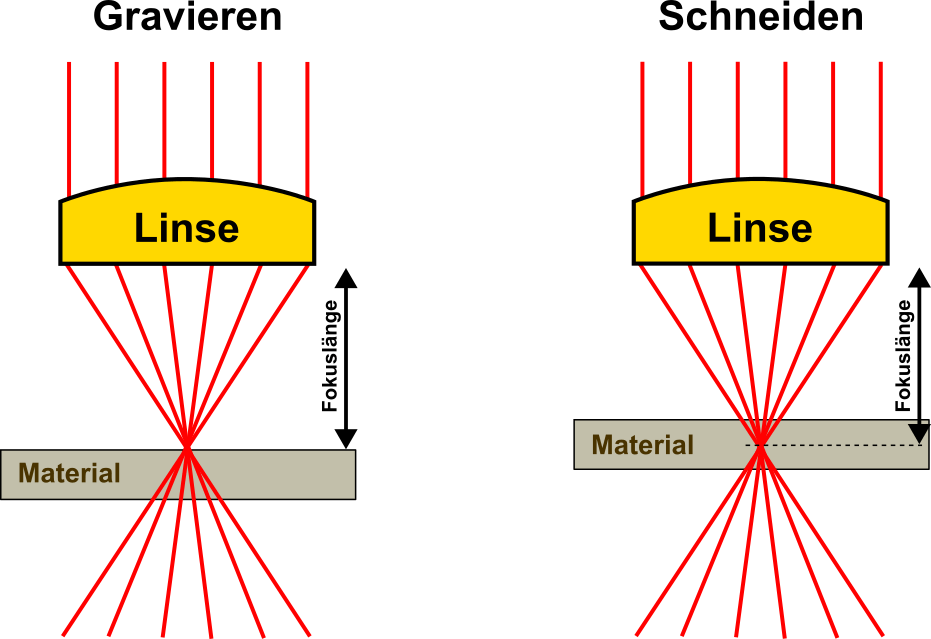
Every laser, whether a diode or CO₂ laser, is equipped with a lens. Before the lens, the laser beam in a CO₂ laser can be up to 20mm thick. The lens focuses the beam, enabling its energy to be used for cutting and engraving. Due to optical principles, the laser beam forms an X-shape after passing through the lens. Depending on the type of lens, this X-shape is more or less pronounced.
Most CO₂ lasers are equipped with a 2-inch lens, meaning the focal length is 2.0 inches (50.8mm). The focal length is the distance from the surface of the lens to the center of the X. At the center of the X, all laser beams converge to form a tiny spot (~0.1mm diameter), known as the focal point.
At the focal point, you achieve the sharpest engraving and the highest energy density, essential for cutting. If you’re even slightly outside the focal point, engravings will blur, and the laser may fail to cut through the material. But how can you correctly adjust the focus of your laser?
Three Simple Methods to Adjust Laser Focus
1. Determining the Focal Point with a Ramp Test
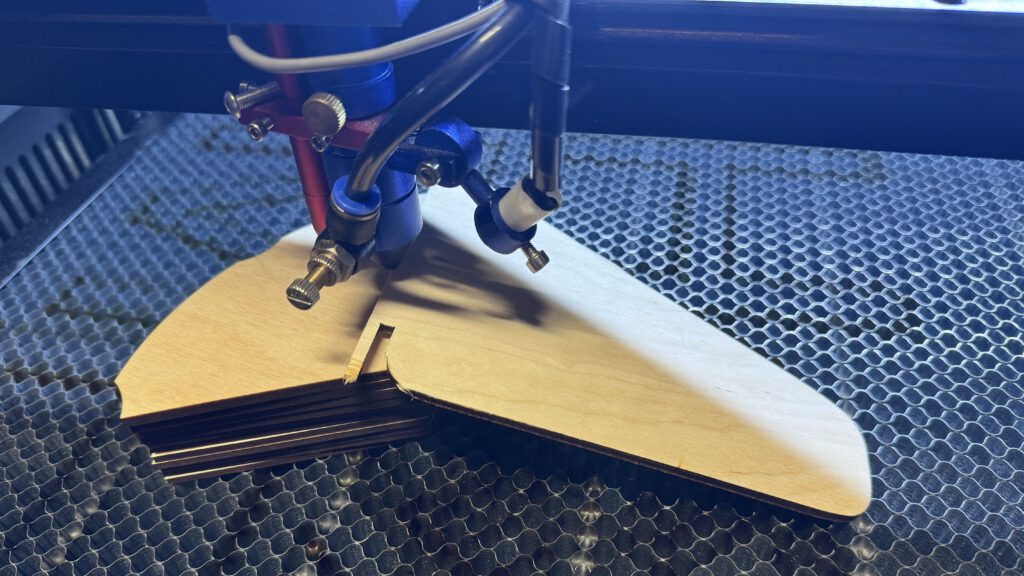
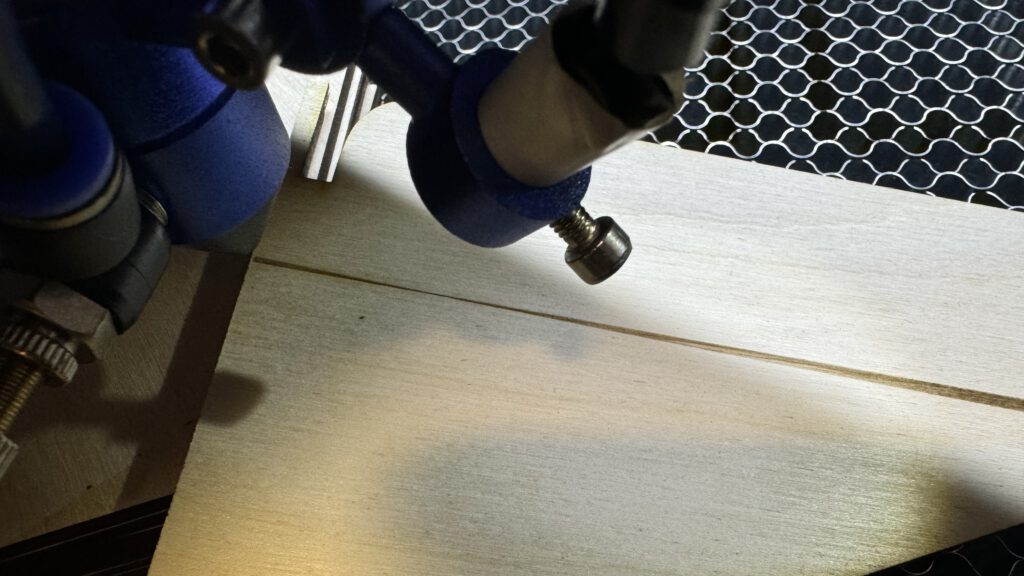
The most popular and straightforward method to determine the focal point is the ramp test. Place a piece of wood at an angle inside the laser and engrave a line on it.
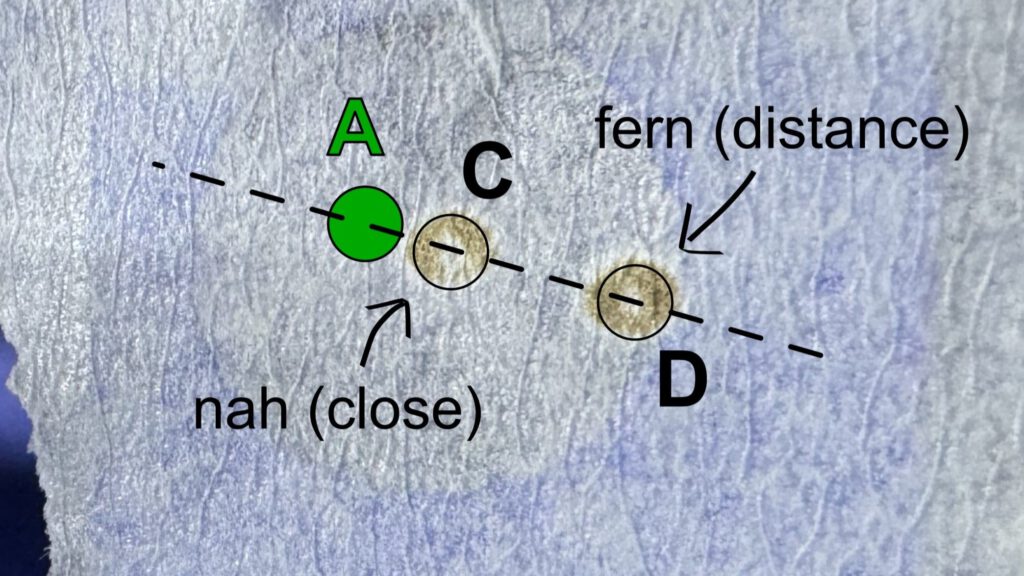
After engraving, examine the line. It starts wide (red section), narrows (yellow section), and then widens again (red section). The narrowest part of the line indicates the focal distance (green section).
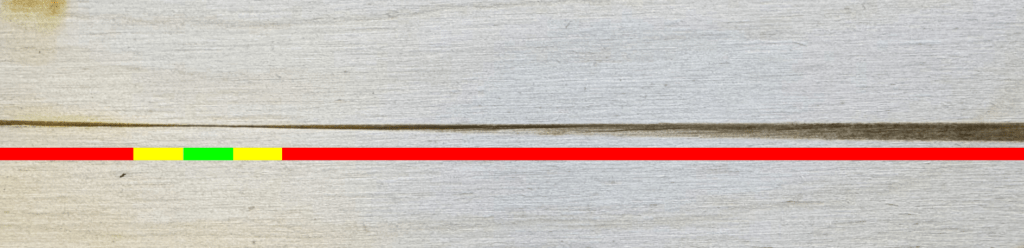
Position the laser head over the narrowest part of the line and measure the distance between the laser head and the material. In my case, it’s exactly 15mm.
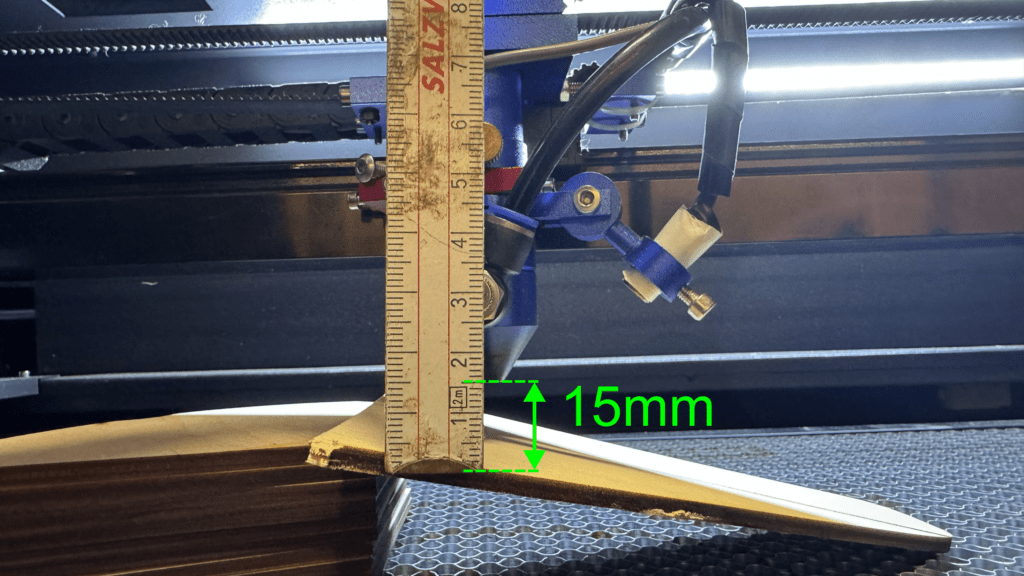
Before every laser operation, ensure the distance between the workpiece and laser head is precisely 15mm. If using a material of different thickness, adjust the distance accordingly. Some lasers allow the table height to be adjusted, while others require adjusting the laser head height.
2. Adjusting Focus with Lightburn Focus Test
The Lightburn software offers another way to determine the optimal focal point, provided your laser has a movable Z-axis enabled in the device settings. In Lightburn, the focus test can be accessed under Laser Tools > Focus Test.
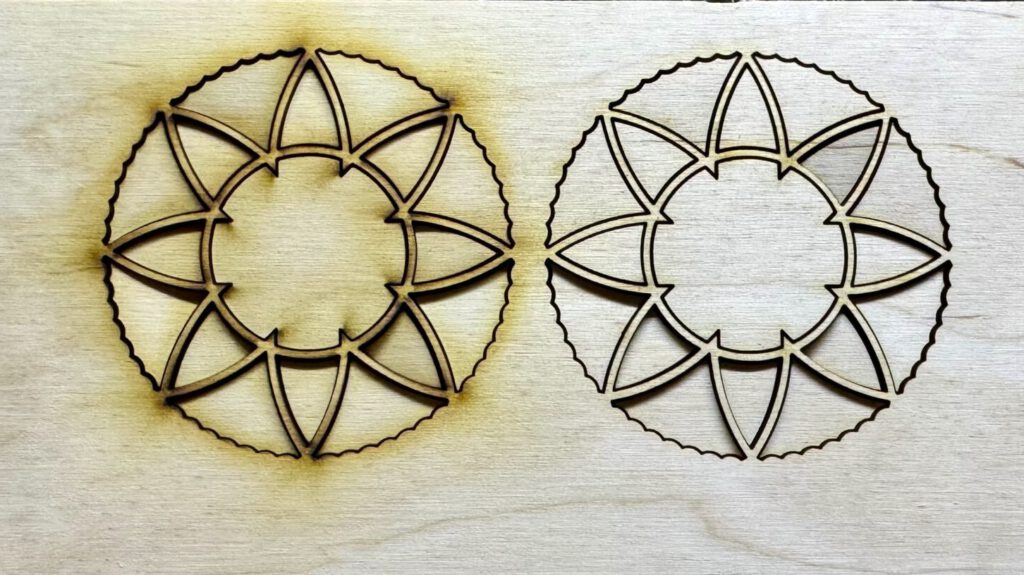
Using the ramp test to find a rough focal distance, I fine-tune it with Lightburn’s focus test by setting six steps. Each step increases the distance between the laser head and workpiece by 0.5mm, engraving a line at each step
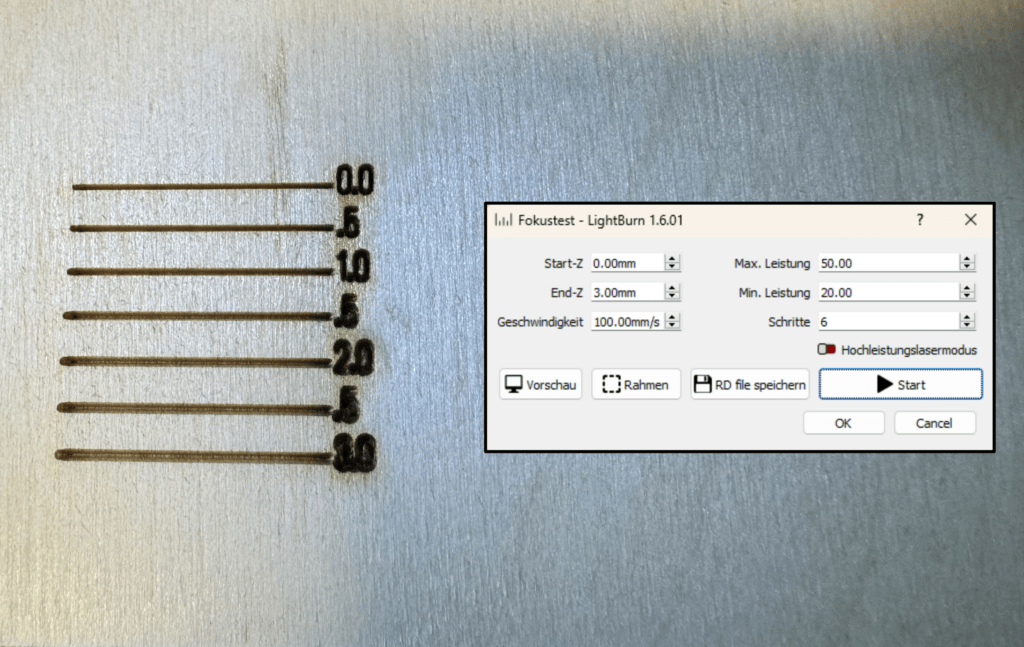
The image clearly shows that at 0.0 (exactly 15mm distance), the line is thinnest, and the text is sharp. As the distance increases, the text becomes blurry, and the line thickens. The 15mm distance determined in the ramp test was correct—the focus is perfectly adjusted.
3. Automatically Adjusting Focus with Autofocus
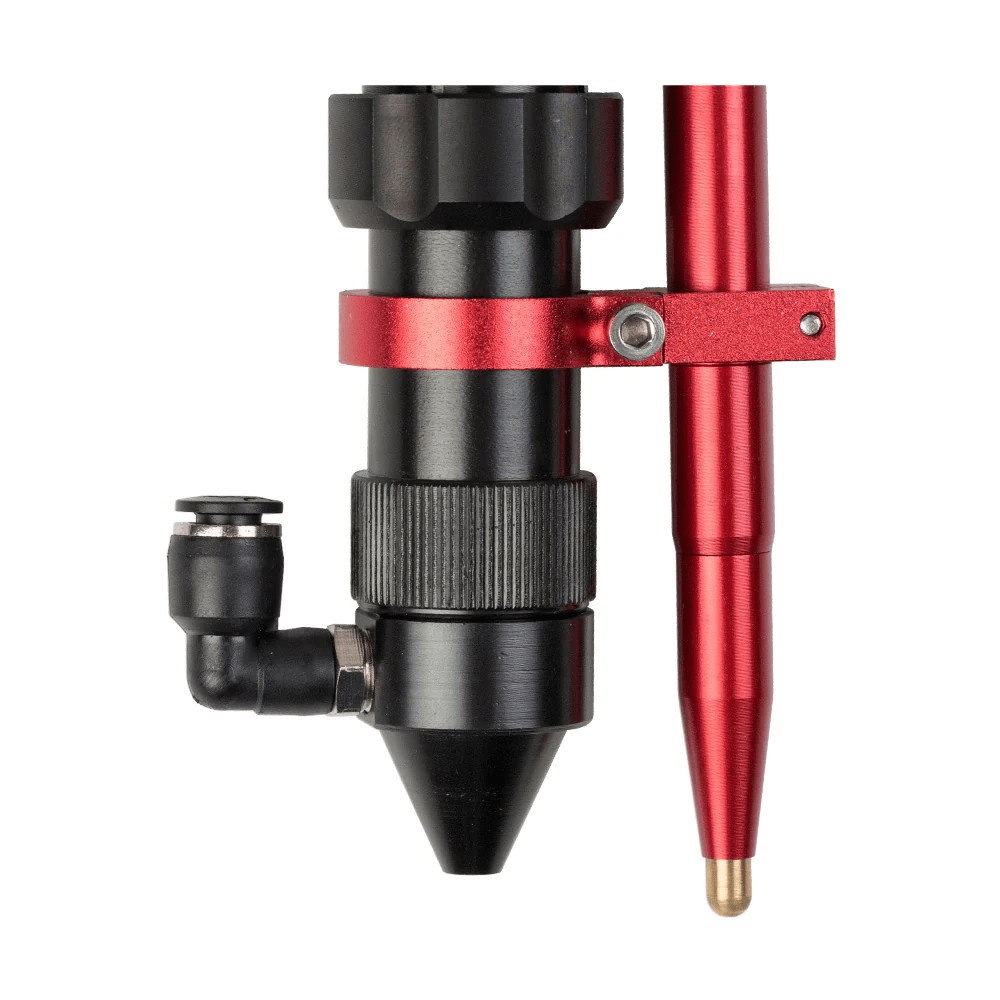
Modern laser machines often feature an autofocus system. This includes a tactile sensor on the laser head (red in the image) connected to the controller. The controller automatically adjusts the table or laser head height to ensure the focal point aligns with the material surface, saving time and effort.
During autofocus, the sensor detects the material’s height and sets the pre-programmed focal distance. This distance must be determined initially using the ramp test or Lightburn focus test and saved in the controller.
You can retrofit autofocus to your laser with kits such as the Cloudray Z-Axis Focus Sensor (Amazon*). If your Z-axis isn’t already height-adjustable via the controller, you’ll need an upgrade kit*, such as the one offered by Omtech. This includes the necessary stepper motor for the Z-axis.
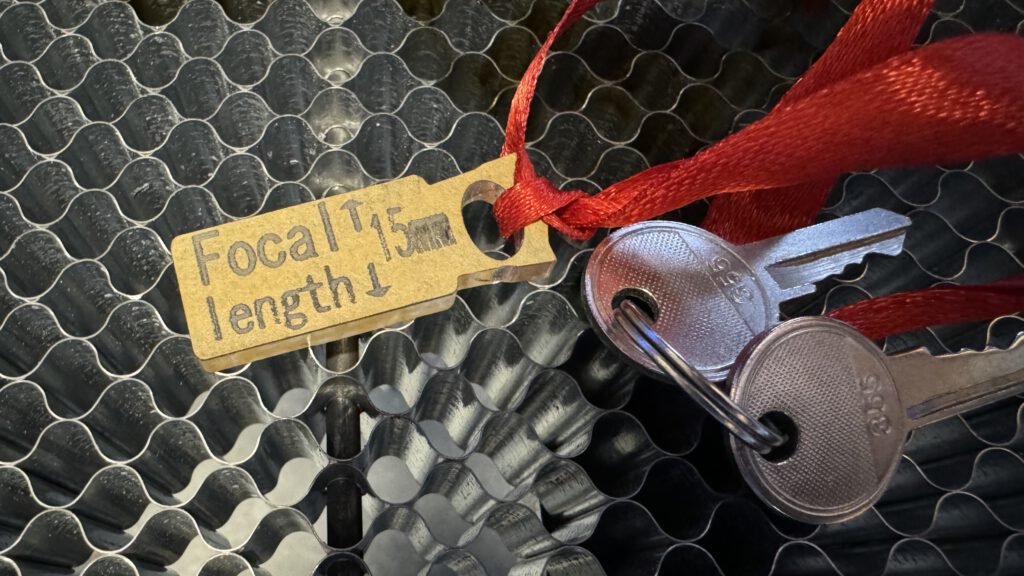
DIY Focus Tool
Although my laser has autofocus, I use a handy tool for quickly checking and adjusting the focus—a small spacer precisely 15mm thick. To avoid losing it, I’ve attached it to my laser’s key.
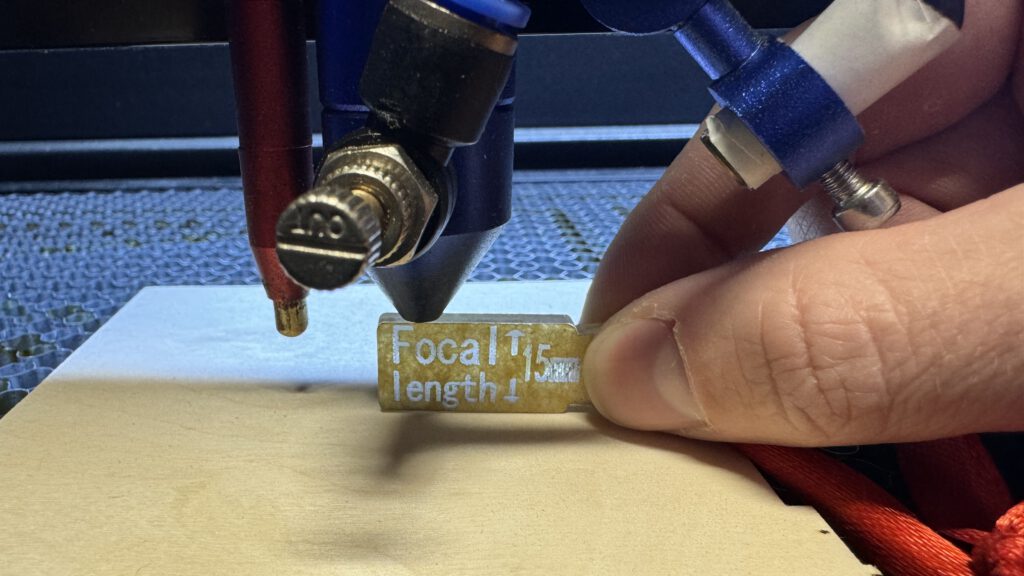
To check or adjust the focus, I place the spacer between the nozzle and material, then adjust the table height so no gap remains between the spacer and nozzle, without clamping the spacer. I perform this routine before every laser operation.
The Lightburn file for the focus tool and an SVG vector graphic for laser cutting it yourself are available here for free download. You can easily customize the file after determining the focus on your laser using the methods described above. I recommend making the adjustment tool from acrylic rather than wood, as wood tends to expand and contract with humidity, compromising its dimensional accuracy over time.
Expert Tip for Cutting Thick Materials
If you know your focal point, it’s clever to position it slightly below the surface when cutting thick materials. Since the laser beam widens below the focal point, setting the focus deeper results in better energy density in the material’s center, reducing scorch marks and achieving a straighter cut.
ADVERTISEMENT: The links marked with an asterisk (*) are affiliate links. If you click on such a link and make a purchase on the destination page, we receive a referral commission from the respective provider or online store. This helps us cover our costs (e.g., web hosting). There are no additional costs or price disadvantages for you when purchasing.