The engraving is done, but everything is covered in brown residue?
Or are your woodcut edges dark brown, especially in the corners? Has smoke left an unpleasant residue on your workpiece? What you’re seeing here is called “smudge.” But don’t worry – with a few simple tricks, you can avoid smudge marks, saving you the hassle of cleaning after laser cutting. In this article, we’ll show you how!
- What is Smudge?
- Reducing Smudge Marks with Proper Laser Parameters
- Clean Optics for Maximum Power
- Focus Adjustment Reduces Smudge Marks
- Use the Right Material
- Air Assist to Prevent Smudge Marks
- Prevent Smudge with Application Tape
- Prevent Smudge Marks from Below
- Conclusion: Is Laser Engraving Without Smudge Possible?
What is Smudge?
Smudge is a byproduct of laser cutting, whether you’re using a diode laser or CO₂ laser. The laser heats the material at the focal point up to 1,000°C, causing it to sublimate (transition directly from solid to gas). During this process, material particles evaporate and settle back onto your workpiece. Once smudge has settled onto the wood, it’s hard to remove. So, it’s better not to let it form in the first place.
Reducing Smudge Marks with Proper Laser Parameters
The key to minimizing smudge is setting the right parameters, which depend on the material. A test card helps with precise results. Good templates can be found here: Download Omtech test cards
Best Parameters for Cutting
To avoid smudge while cutting, the laser beam should pass through the material quickly. Achieve this by:
- Setting high laser power
- Using high speed
Tip: Cut ideally in a single pass. Multiple passes create more smoke, which can reflect upwards and press onto the workpiece.
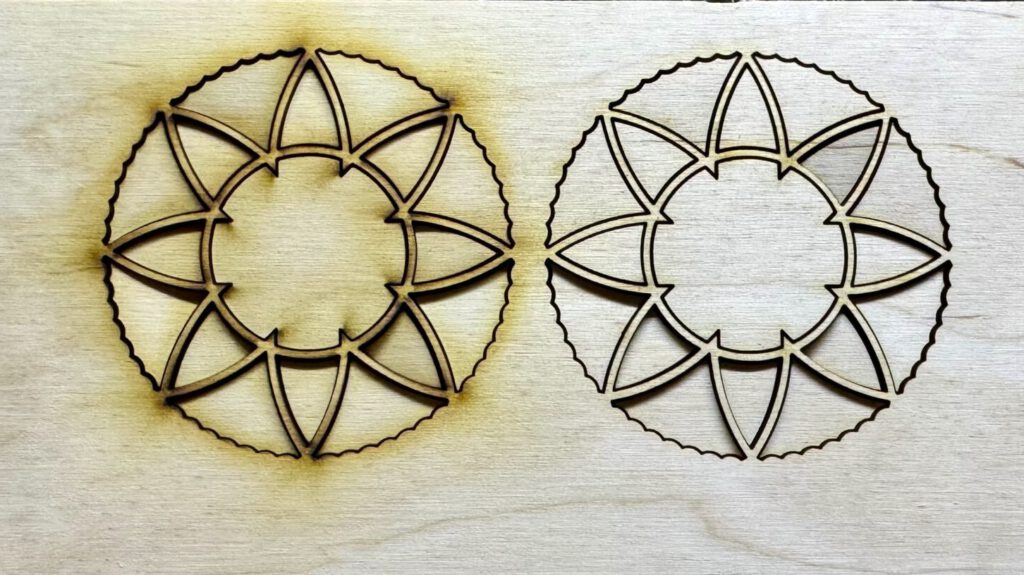
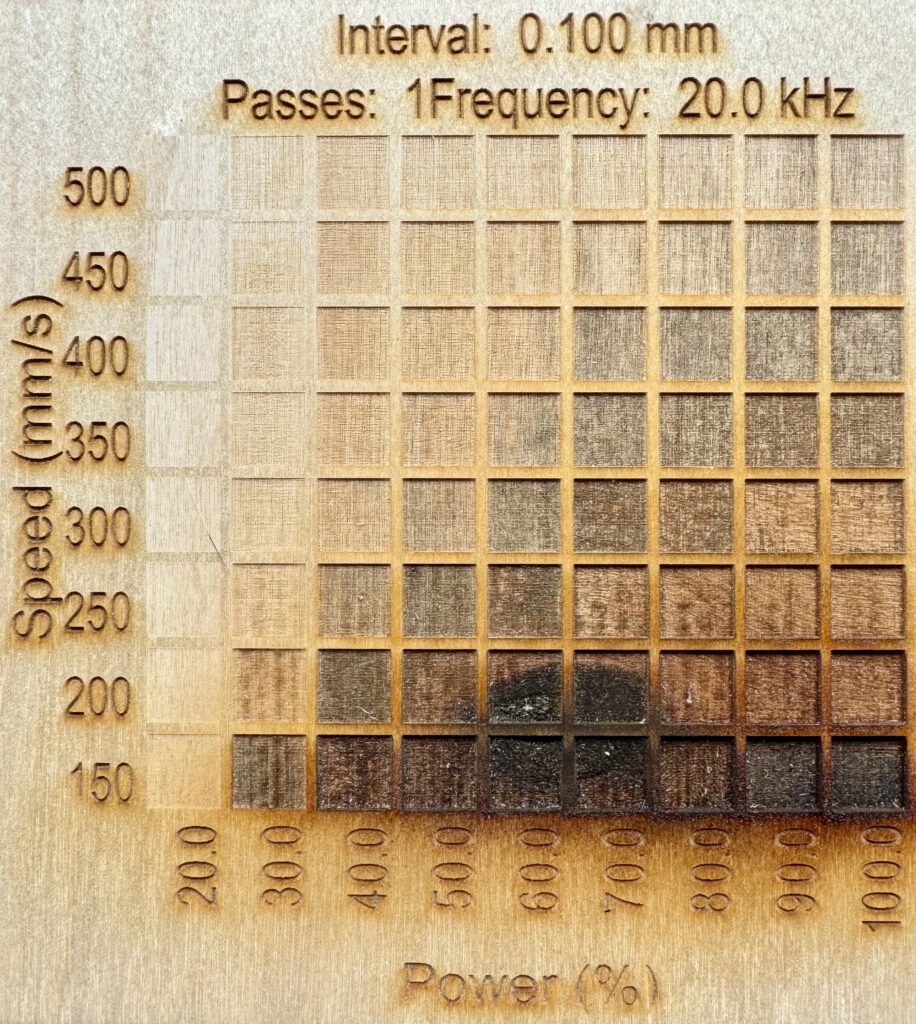
Best Parameters for Engraving
For engraving, the opposite applies: work with low power and high speed to minimize smoke. Use test files in Lightburn or download a parameter test template.
In the example photo, you can clearly see how high power leaves a lot of smudge around the squares (bottom right). With low power (left) and high speed (top), there’s no smudge between the squares
Clean Optics for Maximum Power
To ensure that the laser beam reaches the material with maximum power, the lens and mirrors should be clean and properly aligned.
- Regularly clean the lens and mirrors.
- Check the alignment of the mirrors. The laser beam must hit the mirrors in the center; otherwise, power will be lost. You can find a guide here: CO2 laser mirror alignment – A Step-by-Step Guide
Focus Adjustment Reduces Smudge Marks
The laser beam has an X-shape after the lens, concentrating energy on a very small point. Set your focus point correctly on the material, especially for thicker materials, where placing the focus point in the middle instead of on the surface will allow for higher cutting speeds.
A detailed guide on adjusting the focus on your laser can be found in the article Adjusting the Focus on Your Laser – 3 Simple Methods.
Use the Right Material
The material plays a significant role in smoke production.
- MDF produces more smoke than plywood due to the higher resin content.
- Softwoods like fir or pine contain resins that leave sticky residues when vaporized.
Prefer high-quality materials like birch or poplar. For plywood, ensure it is explicitly marked as laser-friendly with a clean middle layer.
Good experiences with WOOD4PROS (15% off with code: laser-crafting) and the Zembrod Plywood Shop..
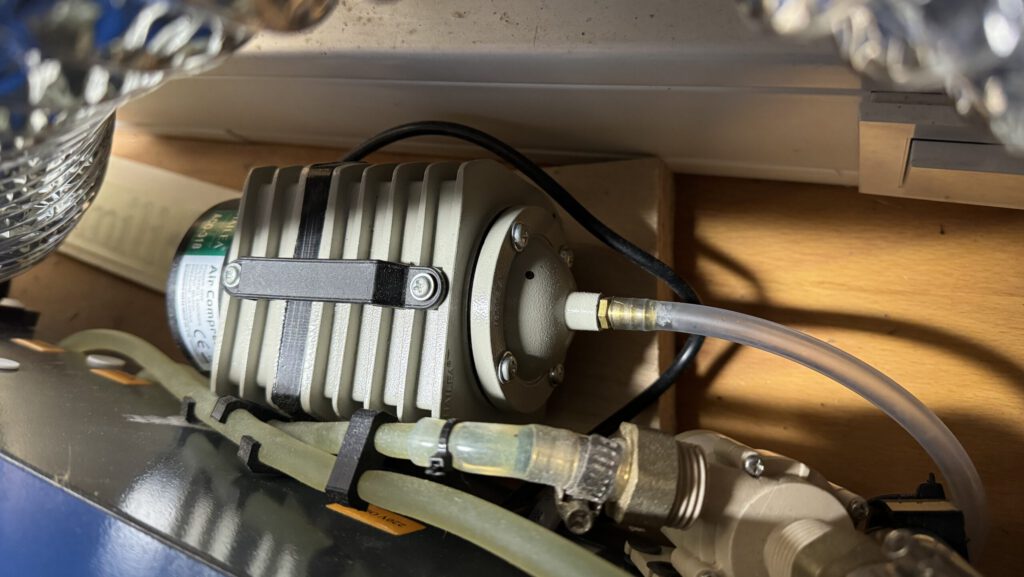
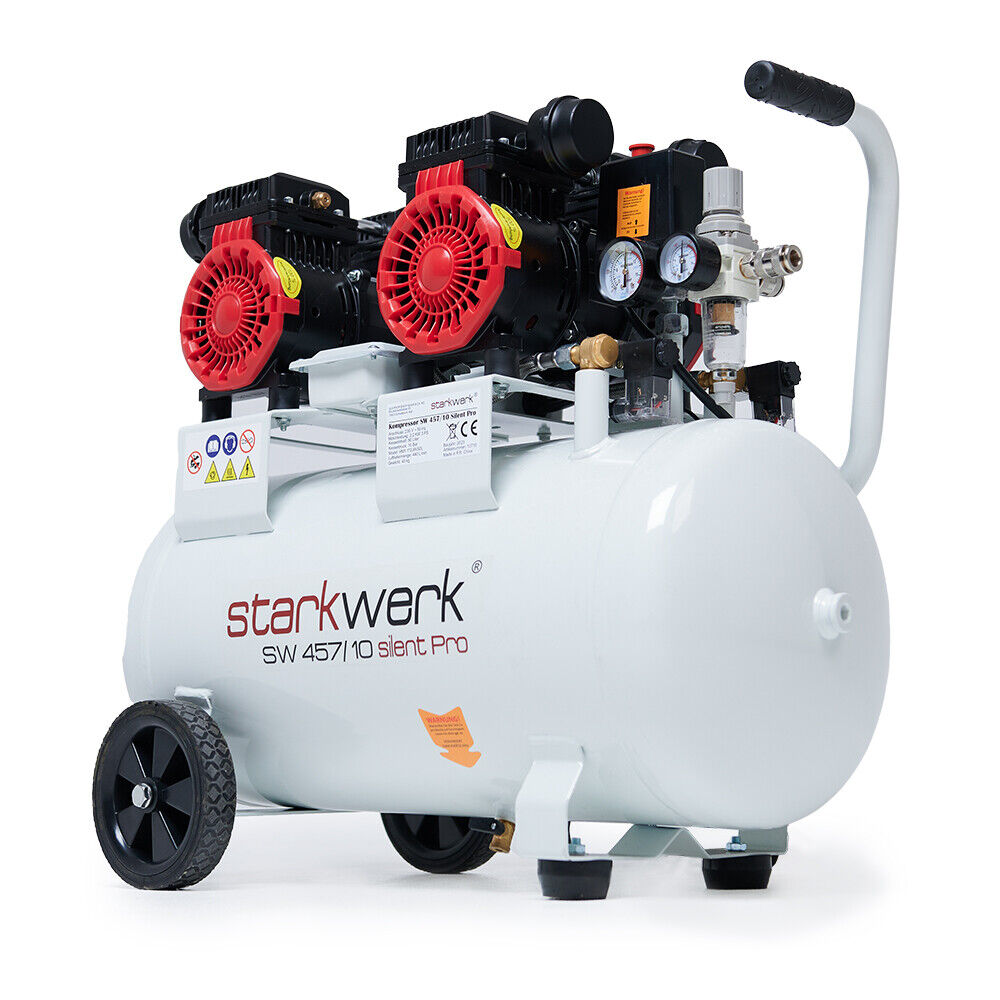
Air Assist to Prevent Smudge Marks
A powerful air assist is essential to prevent smudge marks.
- Use a compressor with at least 1.5 bar pressure and a hose diameter of at least 6 mm.
- My favorite: an oil-free twin-cylinder whisper compressor with a 50L tank volume (Amazon*).
More info can be found here: The Best Air Assist for Your Laser – 3 Variants Compared.
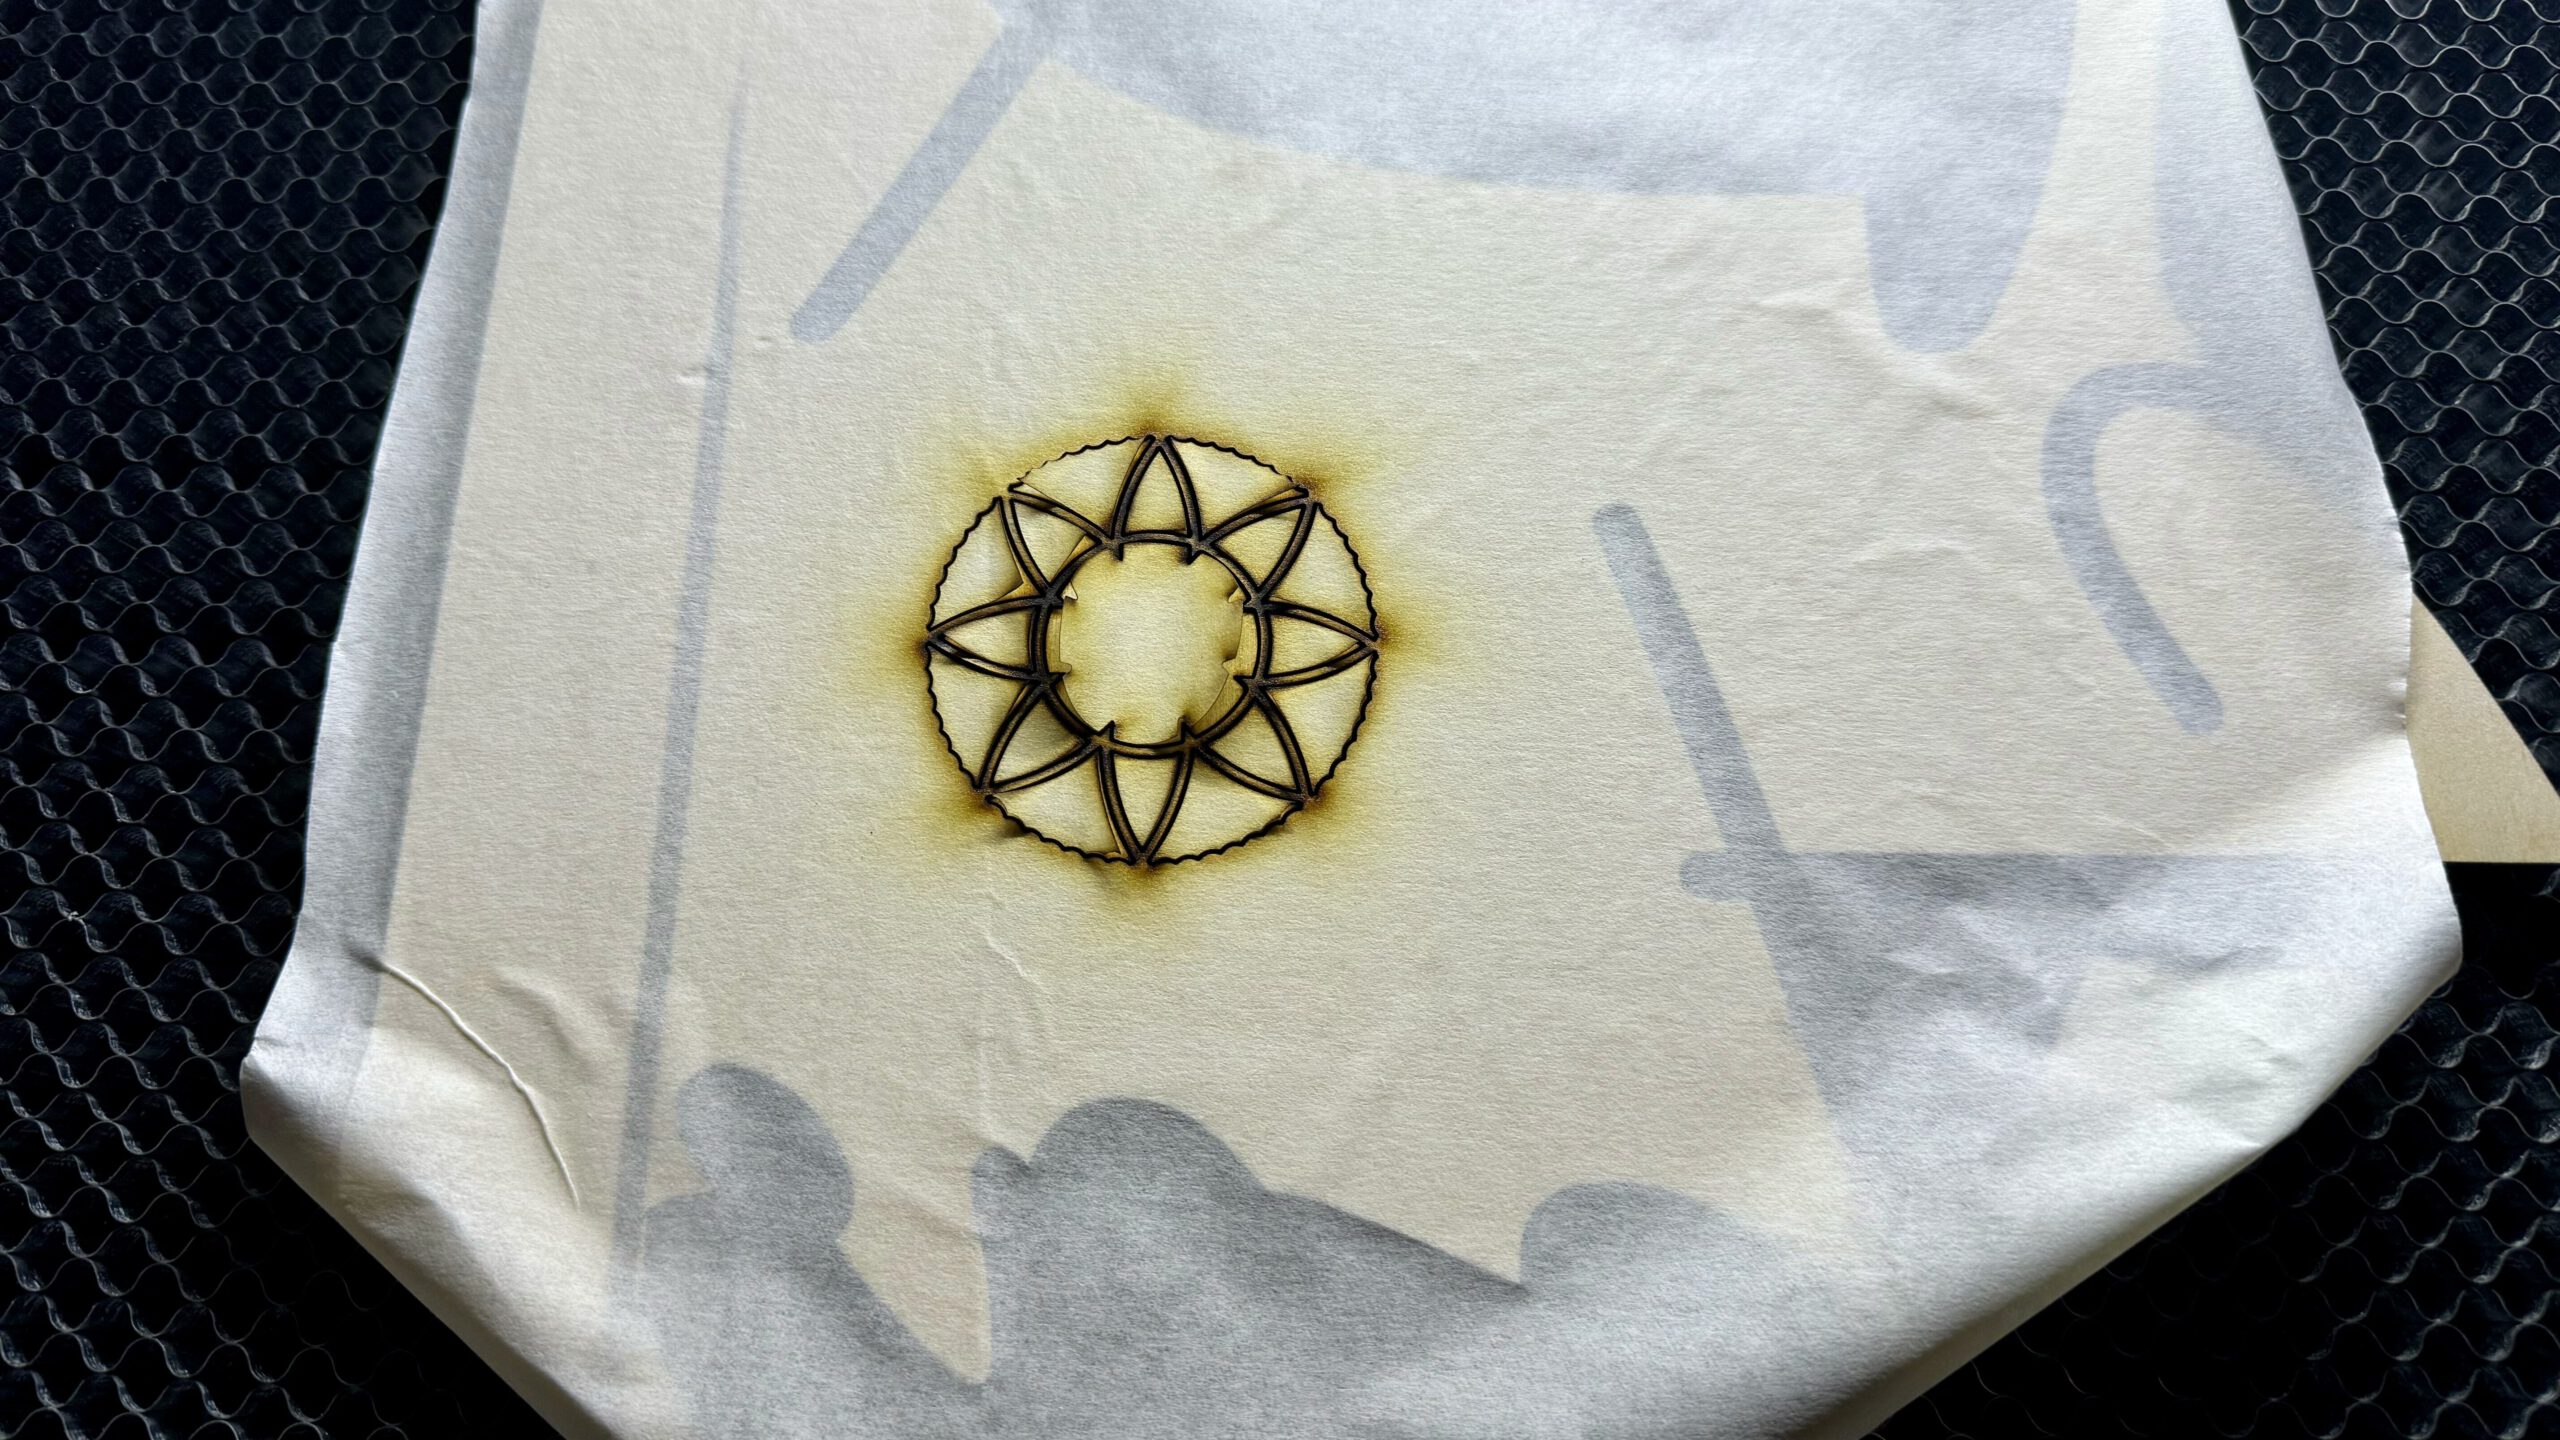
Prevent Smudge with Application Tape
To avoid smudge marks, cover your workpiece with an application tape. This prevents smoke from settling on the workpiece during laser cutting, leaving the surface clean. A popular trick is to use a transfer paper (Amazon*). During laser cutting, smoke settles on the transfer paper, and after cutting, you simply peel off the tape, keeping the surface clean.
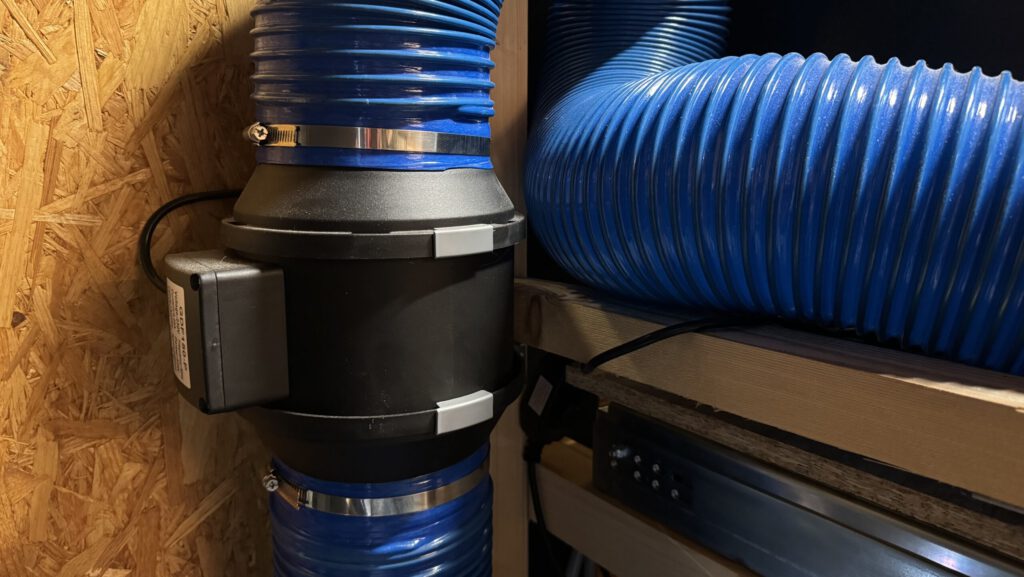
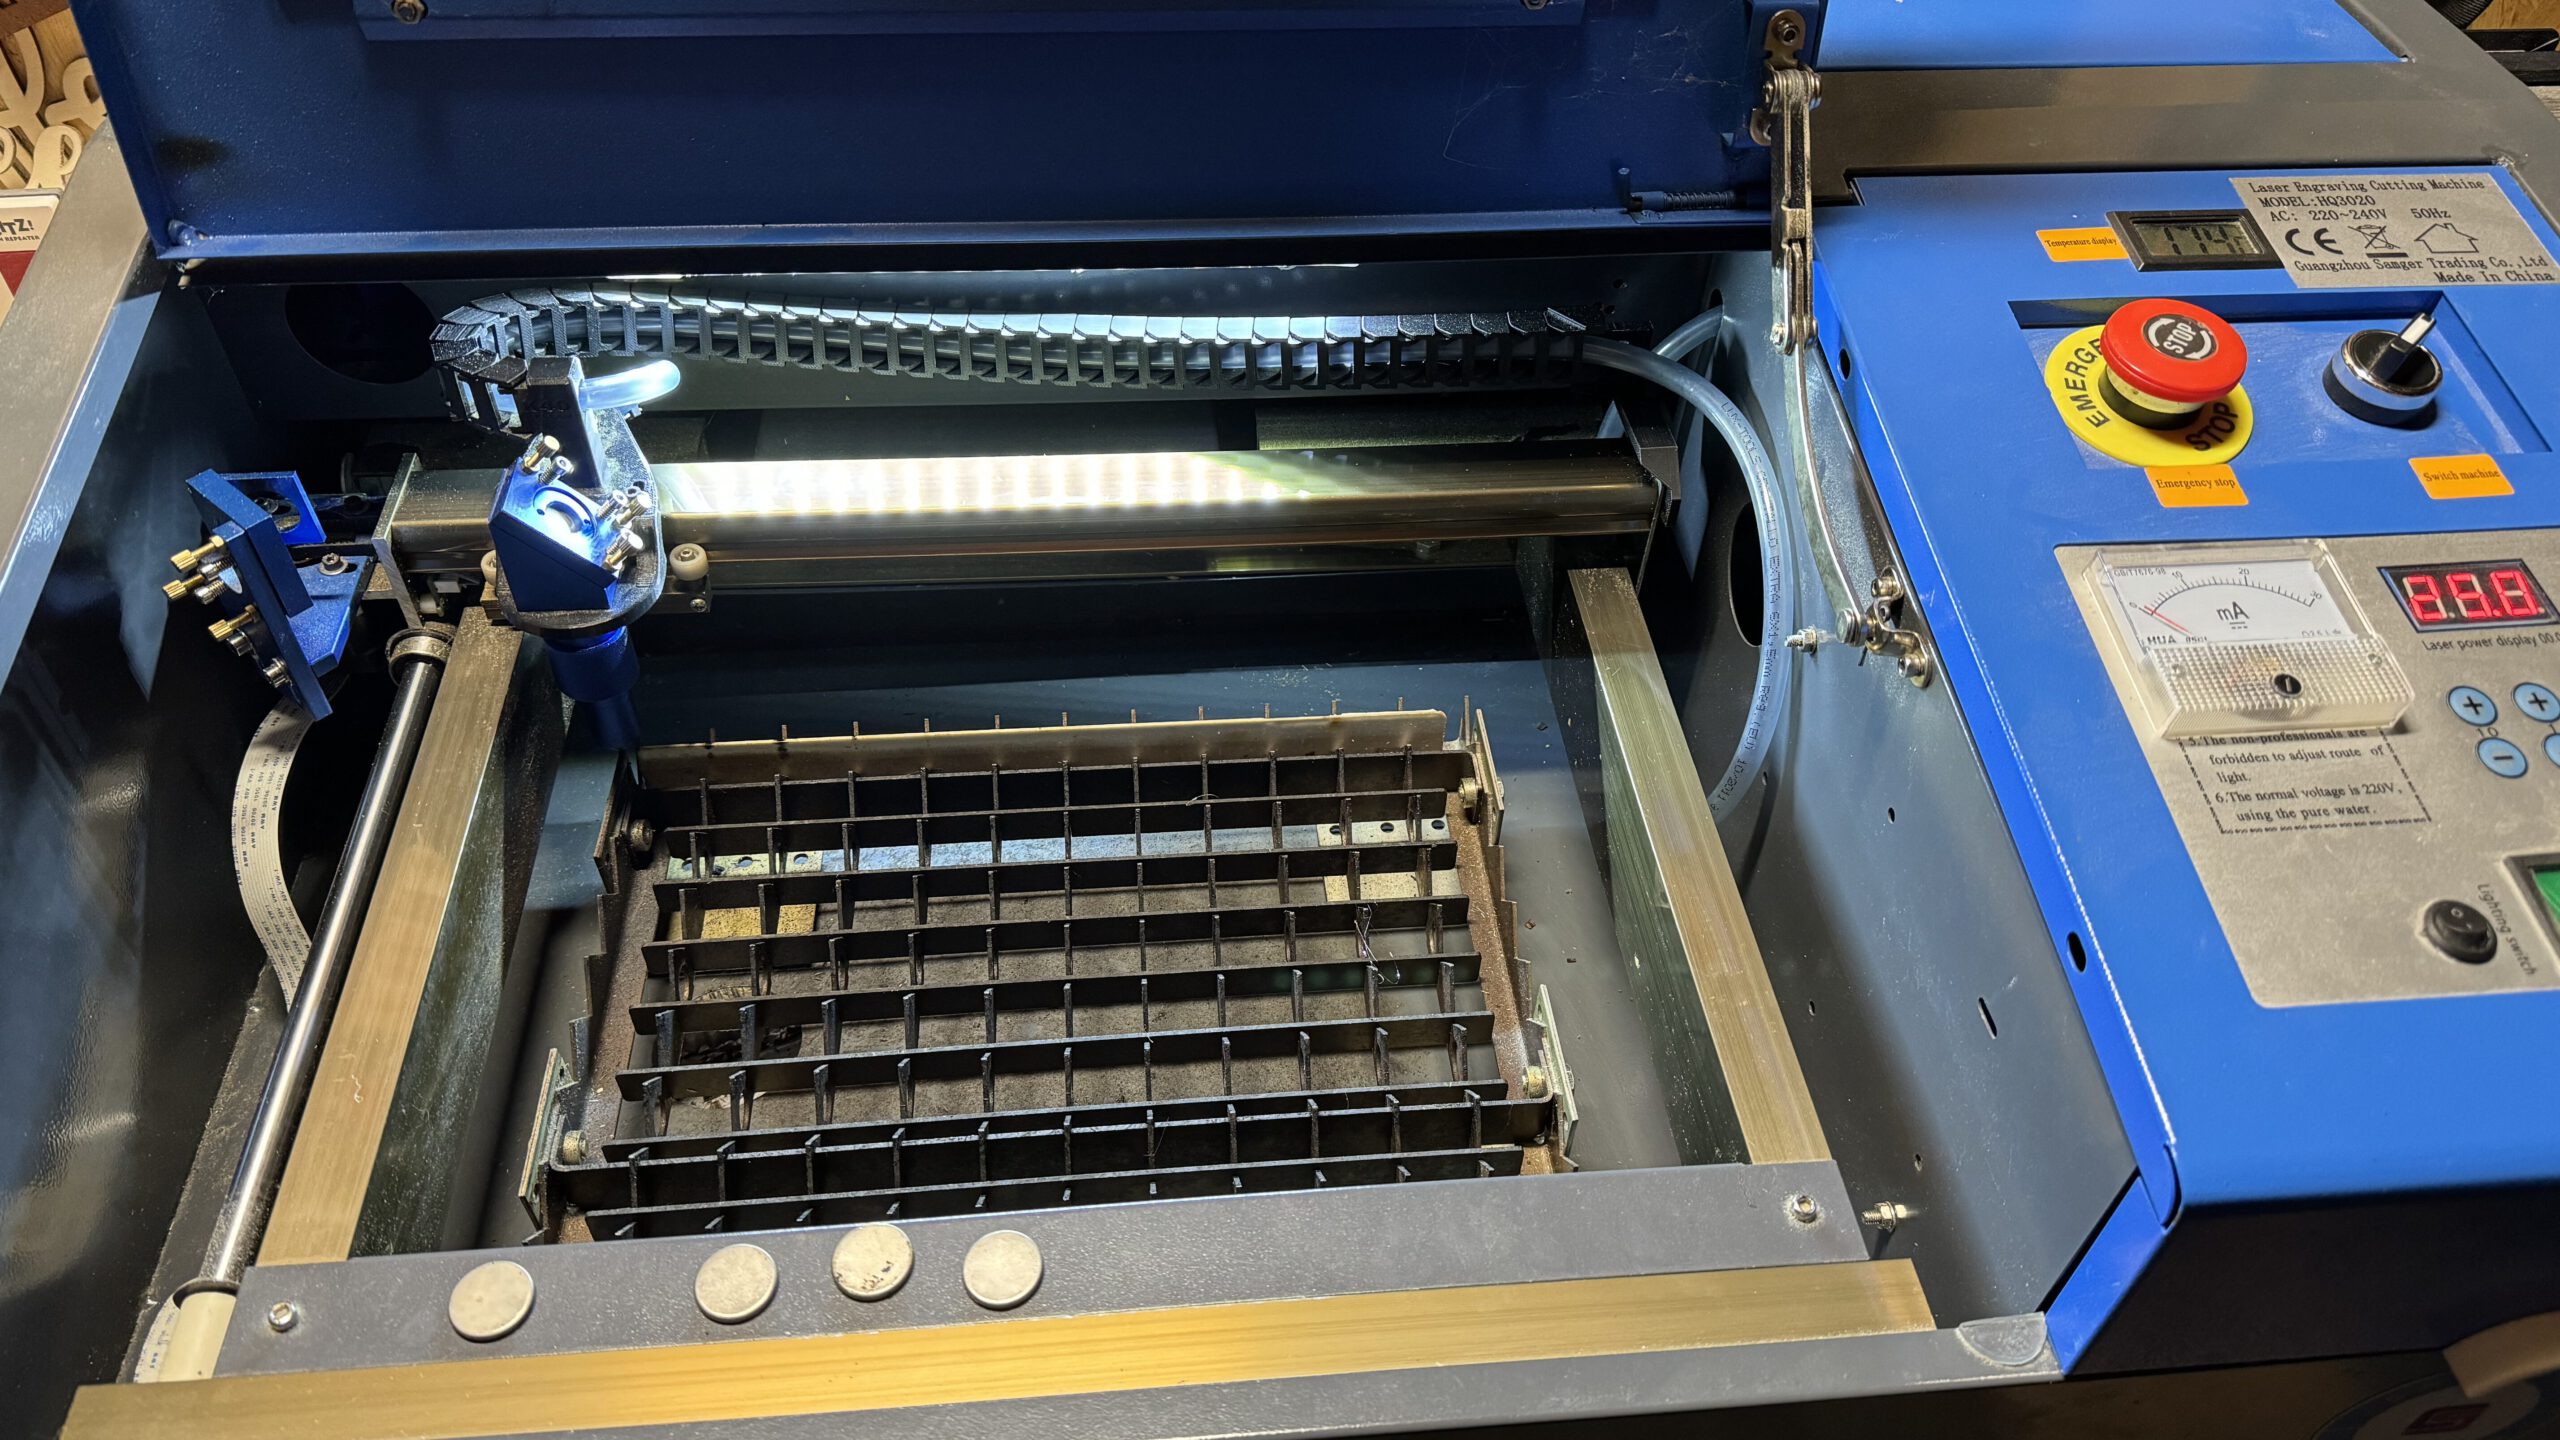
Prevent Smudge Marks from Below
So far, we’ve focused on smudge marks on the workpiece itself. However, smudge marks can also form on the underside of the workpiece. There are two main causes for this:
- Smoke settles from below onto the workpiece.
- The laser beam is reflected off the table and burns the workpiece from below.
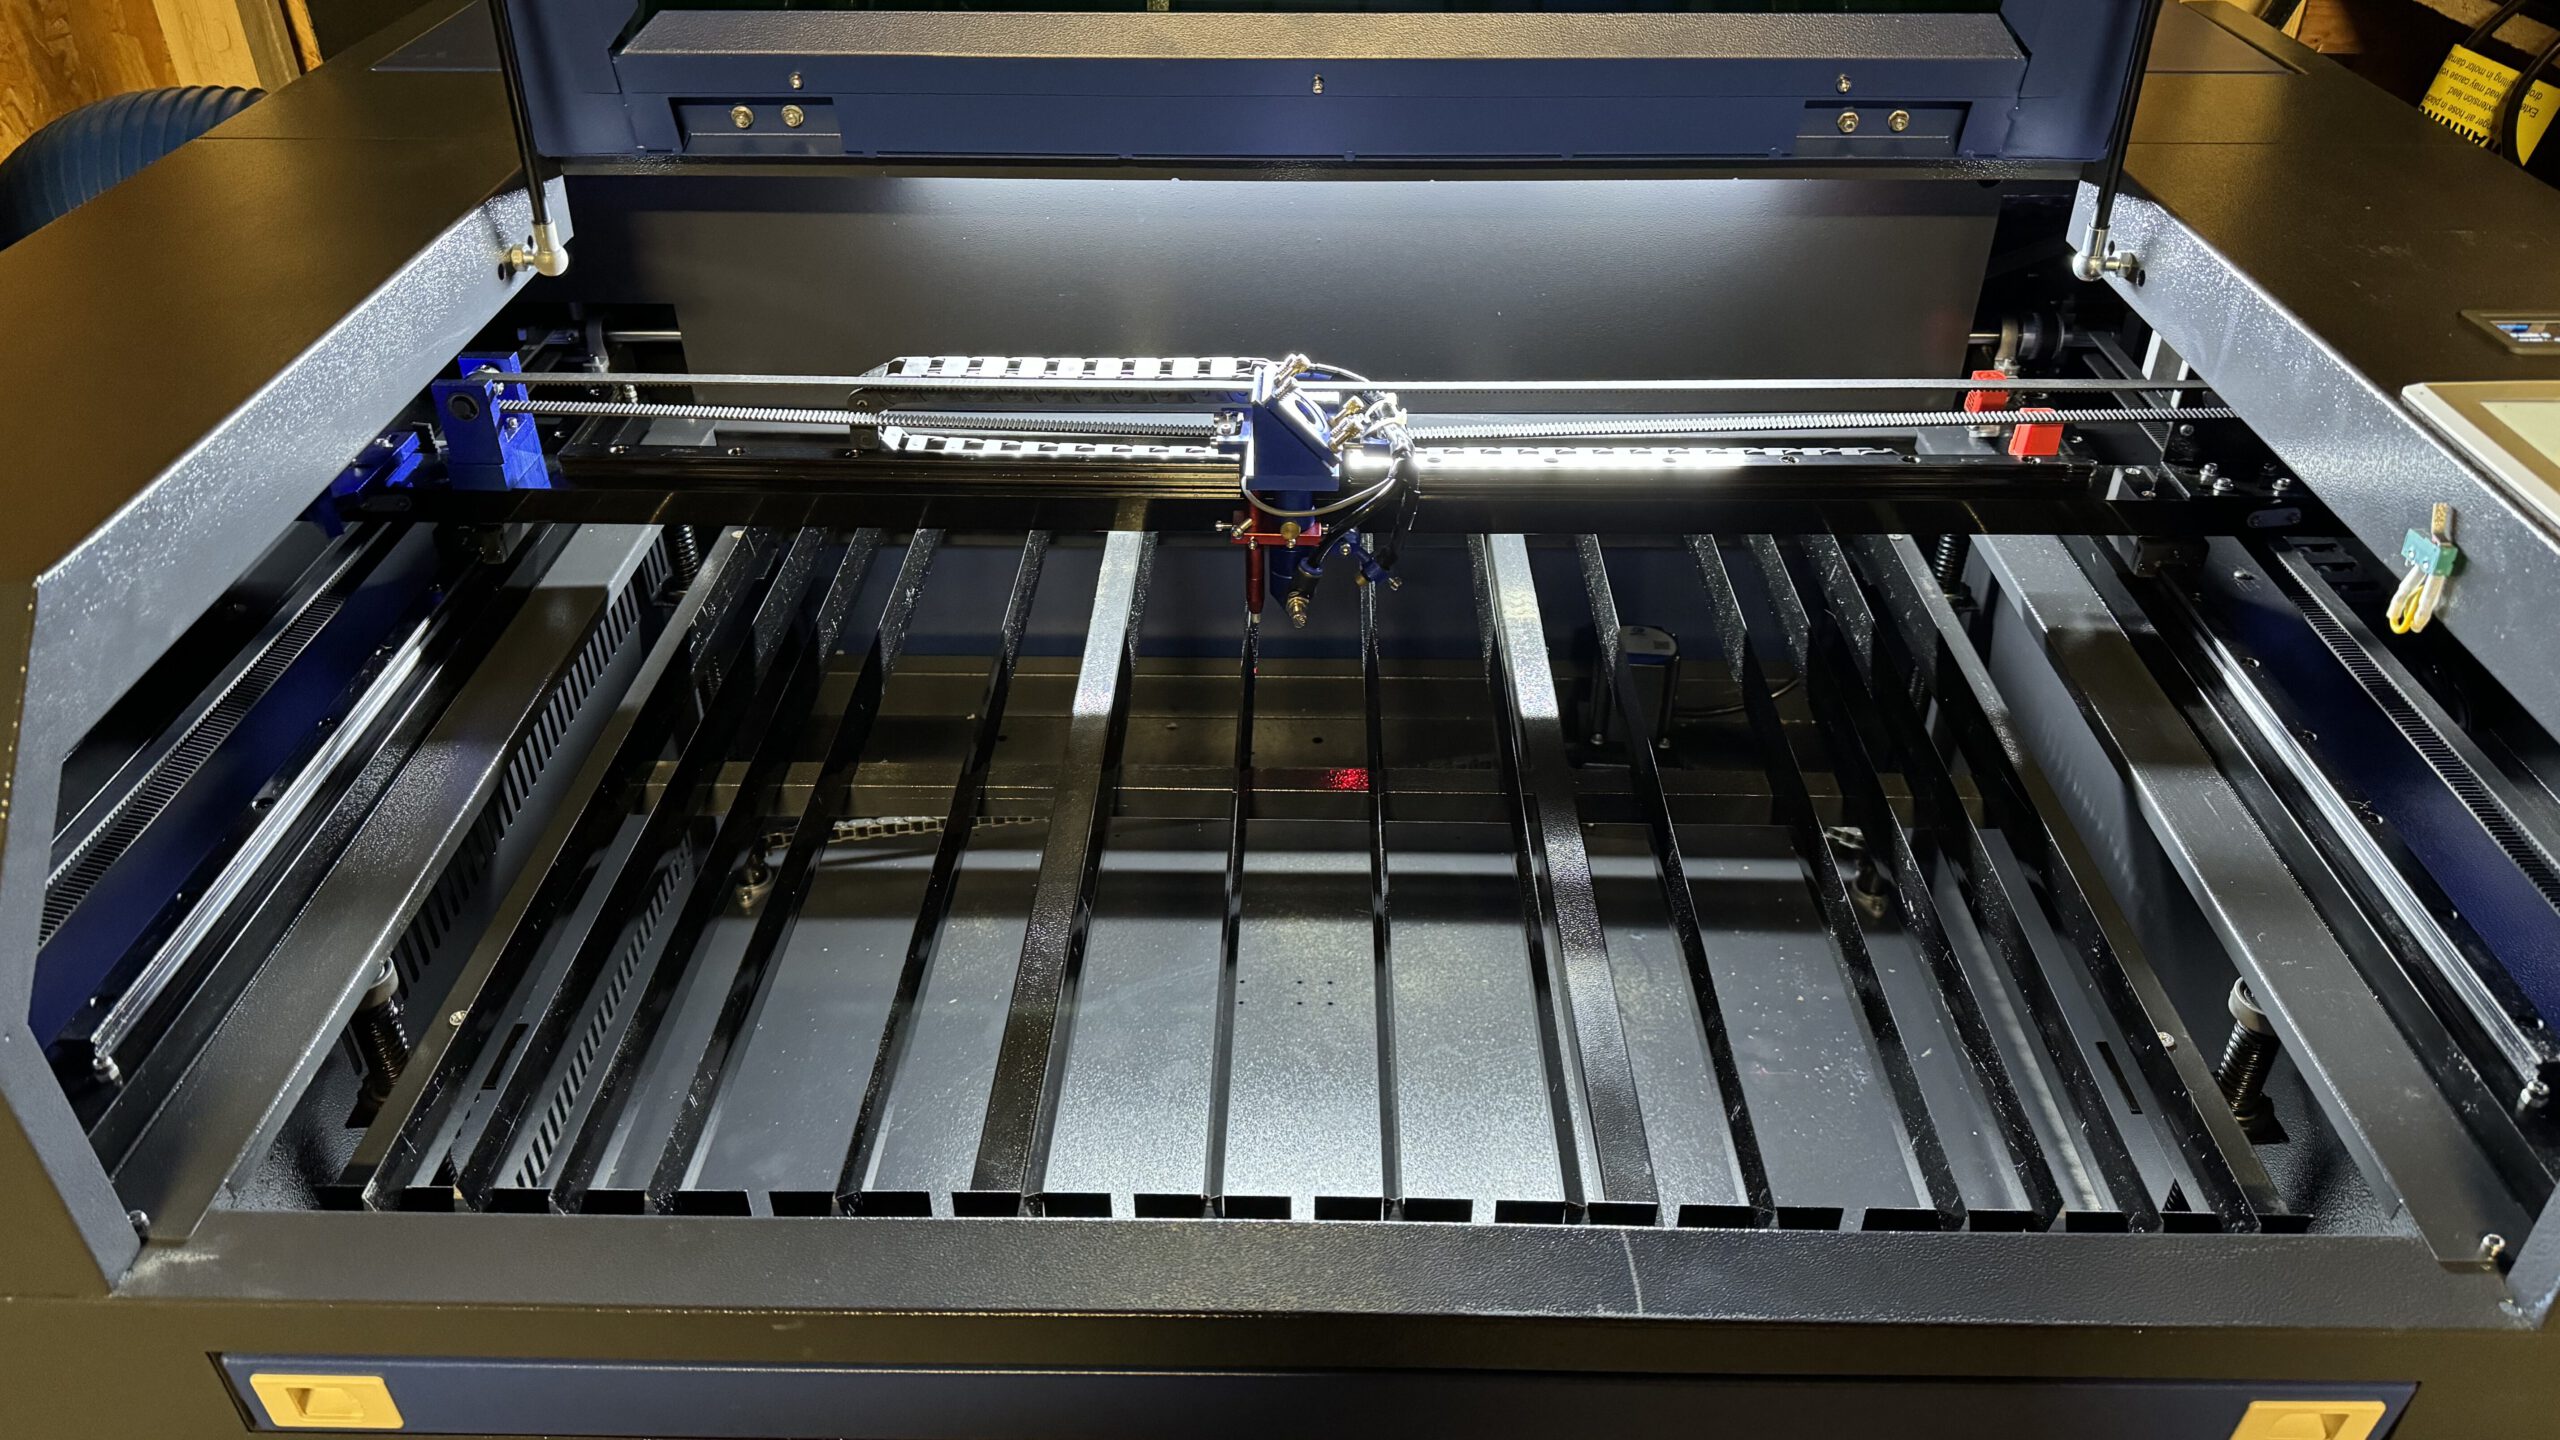
To avoid this, proper air circulation must be ensured below the workpiece, and the contact area between the table and the material should be minimized. Common honeycomb tables (Amazon*) already work quite well for this. Their channels push the air down before it can be drawn sideways into the exhaust. However, traditional honeycomb tables with a cell diameter of 5mm – 7mm still have relatively many contact points where the laser beam is reflected back onto the workpiece from below. This results in a typical dot pattern at the cut edge.

Sawtooth or zipper tables use narrow knives or saw blades to minimize the contact points between the workpiece and the table as much as possible. However, they are less suitable for delicate cuts, as these may fall through to the bottom.
I’ve also had very good experience with this zipper table (eBay*) on my K40. It has practical stops on two sides, which allow you to align the material reproducibly. This often saves the need for creating templates and alignment aids for repeatedly engraving the same items. Since it is made entirely of iron, you can even hold the material in place using strong magnets (Amazon).
Conclusion: Is Laser Engraving Without Smudge Possible?
Definitely YES!
In this post, I’ve shared many ways to avoid smudge marks during laser cutting. Using these tips, I’ve completely eliminated smudge on my workpieces, saving a lot of time on post-processing like sanding. Combining these methods will help reduce smudge marks on your wood.
ADVERTISEMENT: The links marked with an asterisk (*) are affiliate links. If you click on such a link and make a purchase on the destination page, we receive a referral commission from the respective provider or online store. This helps us cover our costs (e.g., web hosting). There are no additional costs or price disadvantages for you when purchasing.