In this article, we willtell you how to replace a CO2 laser tube. With proper preparation and care, you can carry out this process yourself, saving both time and money. This guide takes you step-by-step through the safe and successful replacement of the laser tube.
Preparation
Materials:
Turn off the power: Disconnect your laser machine completely from the power source.
Create access:
- Make space behind the laser machine.
- Open the laser chamber by lifting the cover.
Step 1: Removing the Old Laser Tube
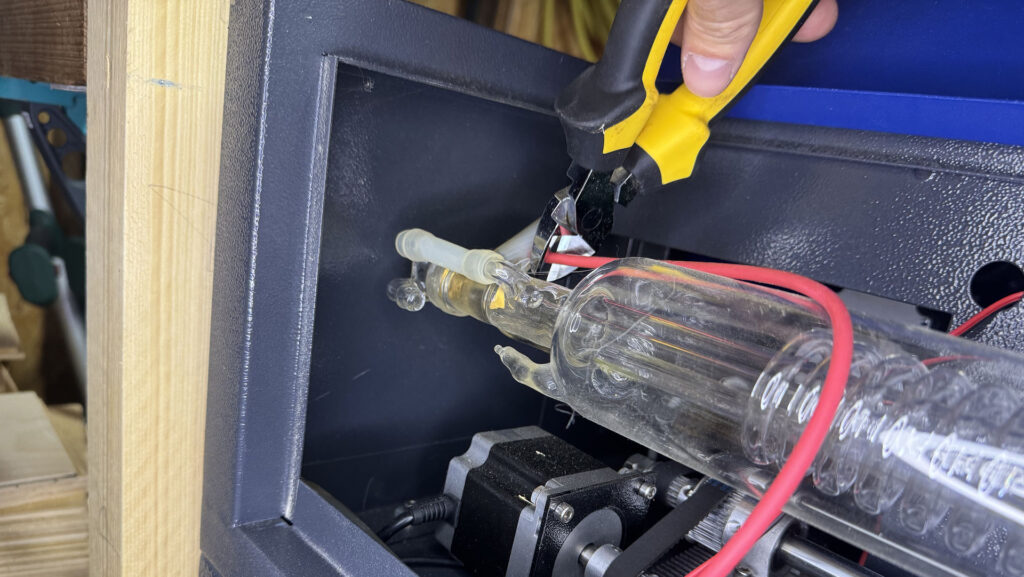
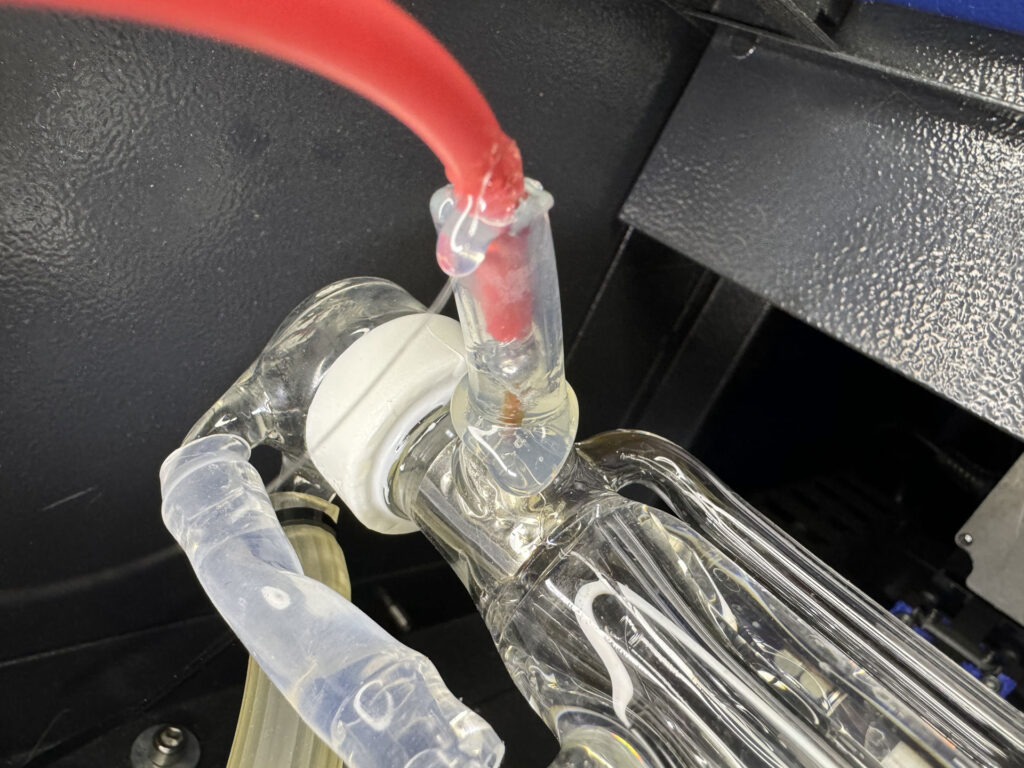
Disconnect cables:
- Carefully remove the protective insulation by gently twisting it.
- Remove glue residue, silicone, or dirt.
- Disconnect the cables from the cathode and anode.
Disconnect water connections:
- Gently remove the inlet and outlet water hoses by twisting and pulling them off.
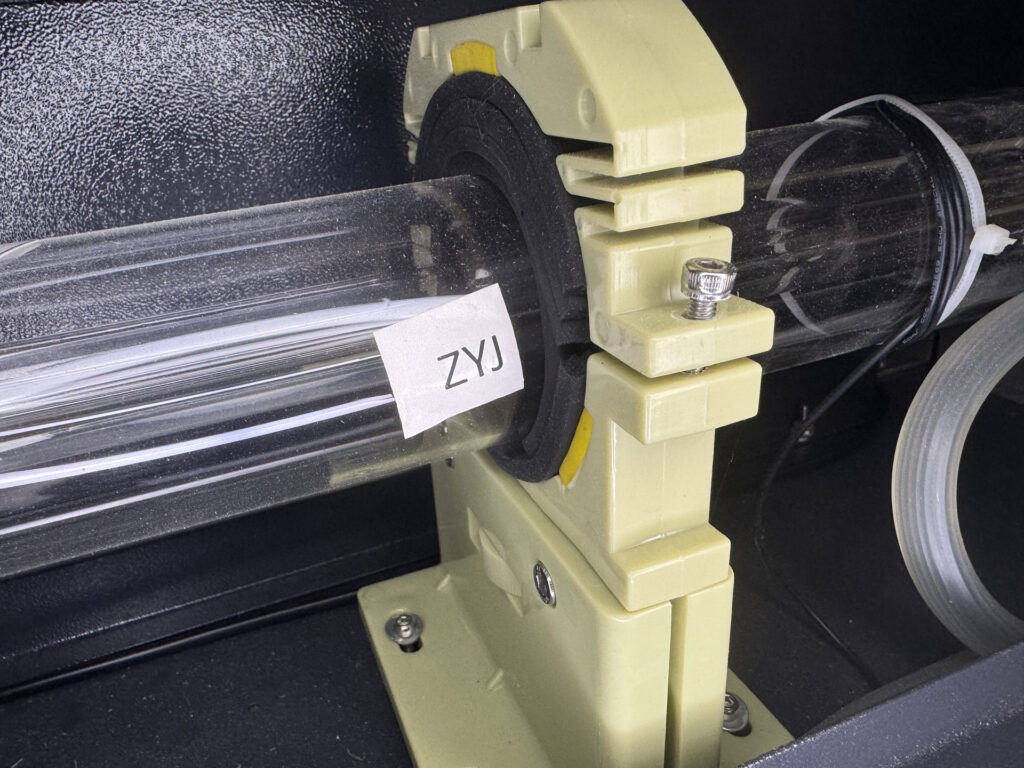
Detach the laser tube:
- Use an Allen key to loosen the tube holders at both ends of the tube.
- Remove the upper part of the tube holders.
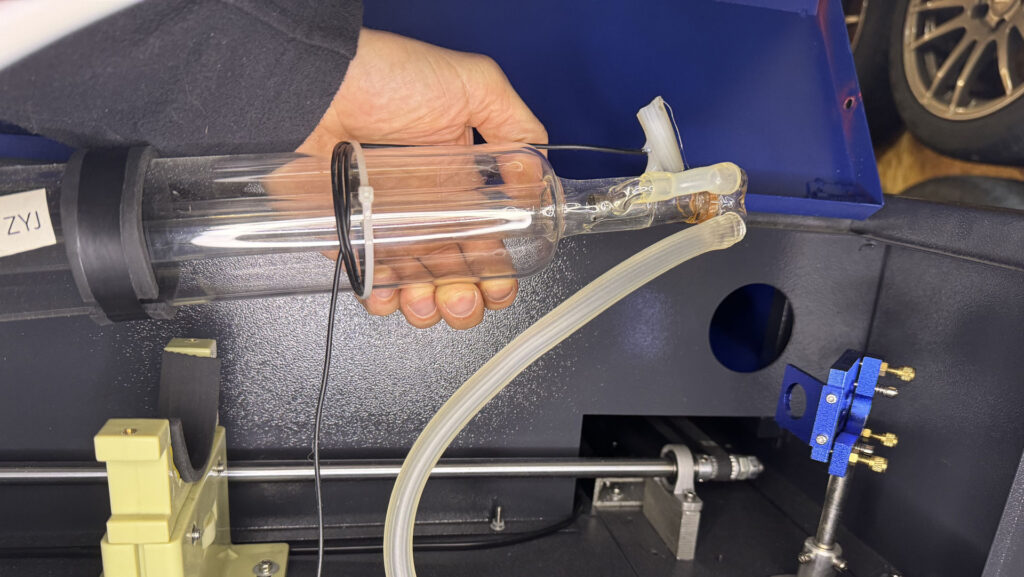
- Carefully lift the laser tube out of the casing.
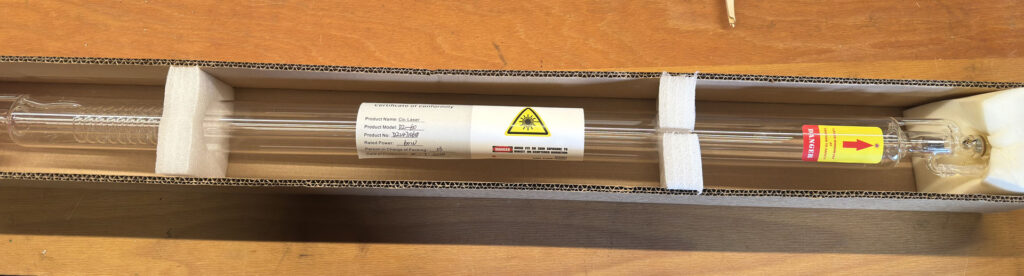
Step 2: Preparing the New Laser Tube
Inspect the new tube:
- Unpack the new laser tube and check it thoroughly for cracks or damage.
- Do not use a damaged tube.
Ensure proper alignment:
- The output end of the tube with the mirror lens should point toward the first mirror.
- Ensure that the anode and grounding connections face upward.
Step 3: Installing the New Laser Tube
Mount the tube:
- Place the rubber spacer into the tube holder.
- Adjust the rubber seals so they fit securely in the tube holders.
- Tighten the tube holders. Only hand-tighten the screws.
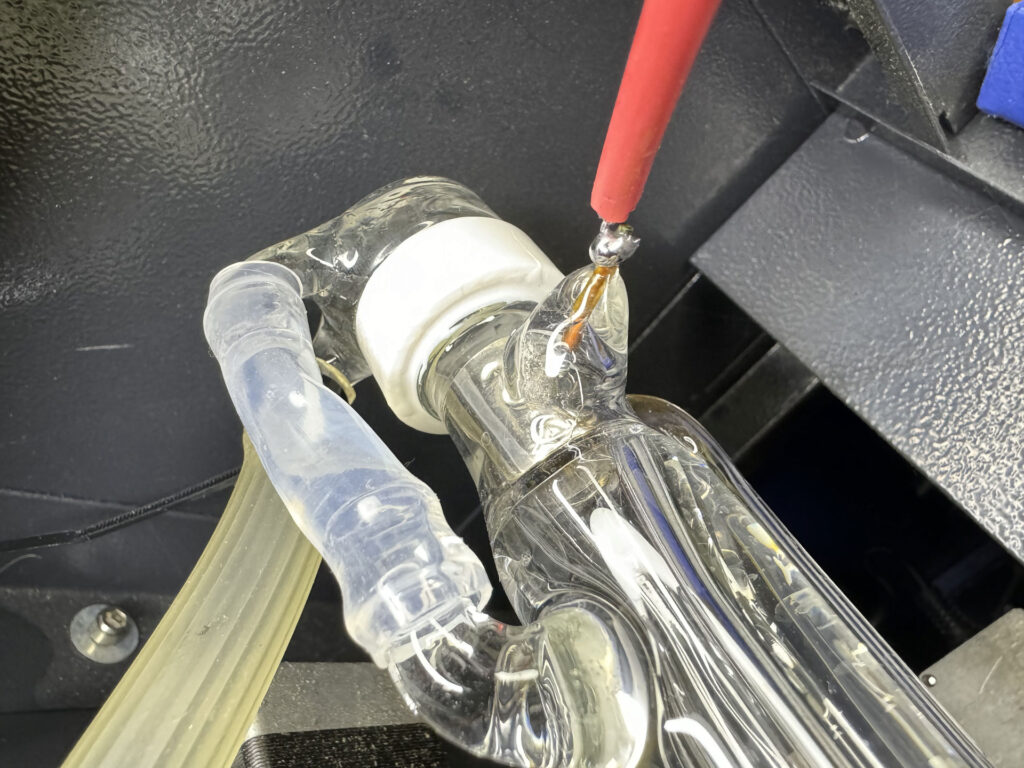
Connect the ground and anode:
- Attach the ground cable to the grounding terminal. Clean the terminal, then wrap the cable around it.
- Solder the connection with a soldering iron and secure it with hot glue. Reapply the rubber insulation.
- Repeat the process for the anode terminal.
Step 4: Water Connections and Bleeding
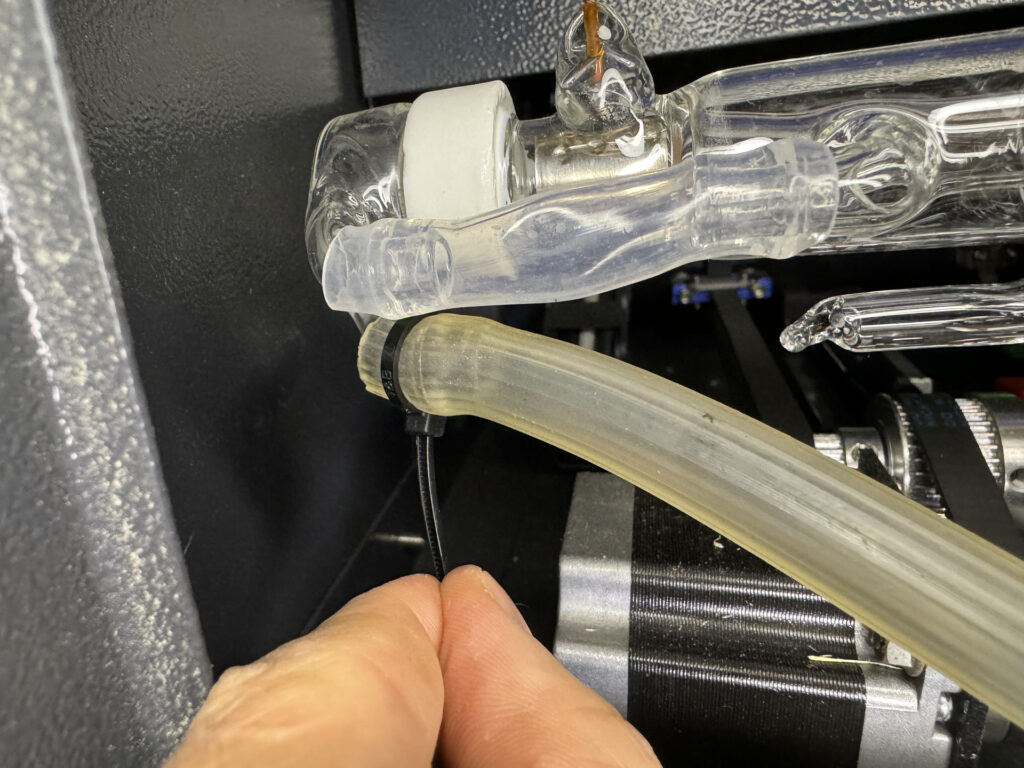
Connect the water hoses:
- Attach the inlet and outlet water hoses to the new tube by gently twisting them onto the glass fittings.
- Secure the water hoses with cable ties. Do not overtighten to avoid damaging the fragile glass tube.
Flood the tube with water
- Turn on the water supply and let it run for several minutes until all air bubbles are gone.
- If bubbles remain, slightly loosen the metal holder and lift the tube to fully remove air from the inlet and outlet sides.
Step 5: Finalizing and Testing
Secure the tube:
- Evenly tighten the screws on the tube holders without overtightening to avoid damaging the tube.
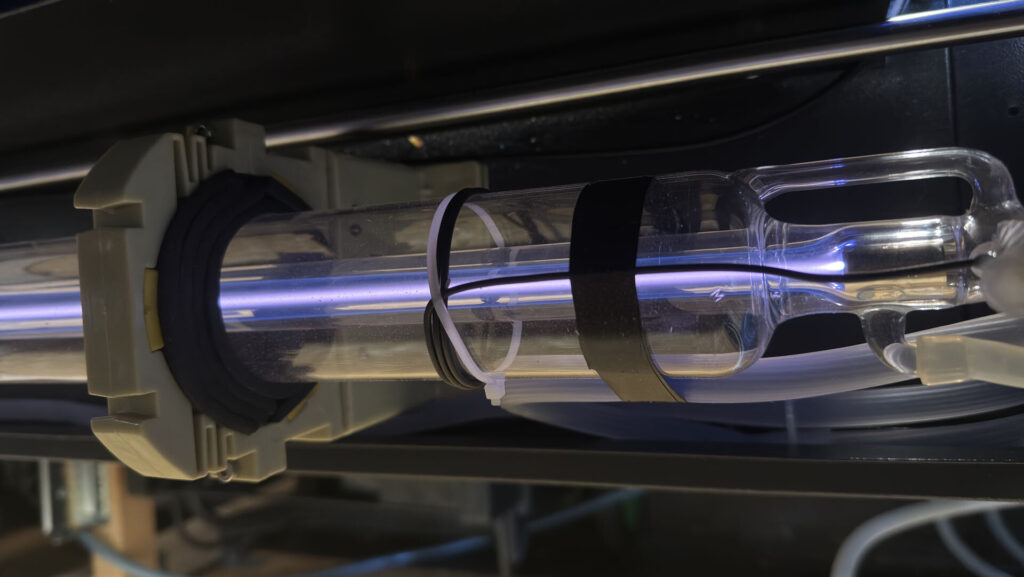
Perform a test:
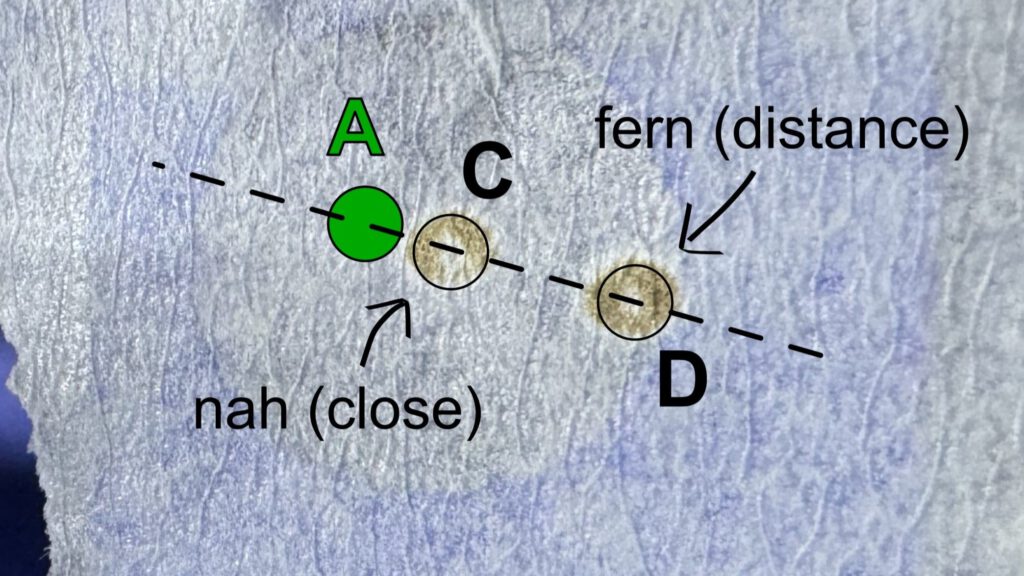
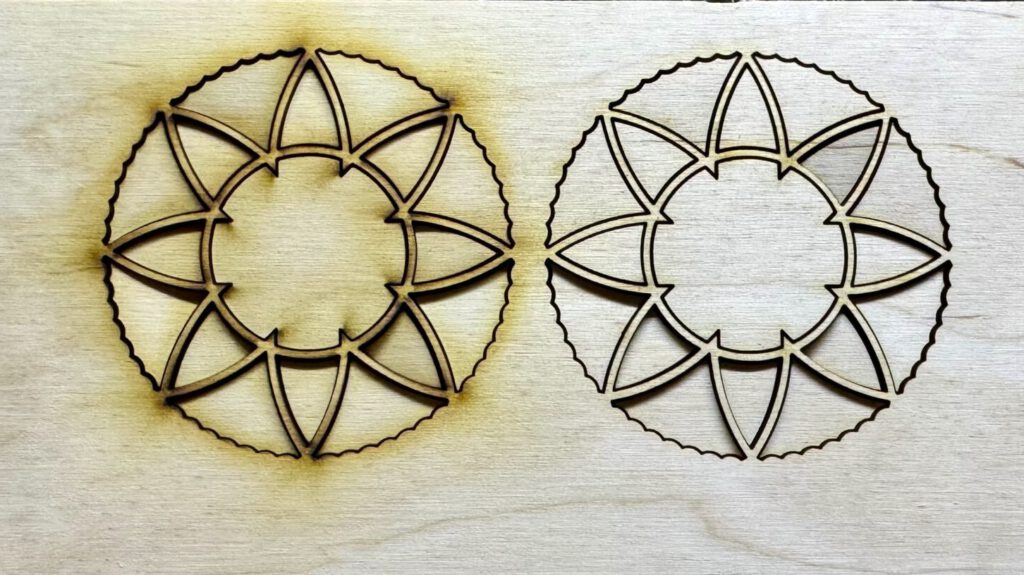
- Reconnect your laser machine and power it on. Fire a test shot.
- Check for a purple light in the middle of the laser tube.
- Place masking tape on the first mirror and ensure a hole is burned into the tape after the test shot.
If the beam is not properly aligned, you will need to adjust the mirrors. A clear guide can be found in this article:
Video
If you need further assistance, this excellent video tutorial provides a step-by-step guide on how to replace a CO2 laser tube:
ADVERTISEMENT: The links marked with an asterisk (*) are affiliate links. If you click on such a link and make a purchase on the destination page, we receive a referral commission from the respective provider or online store. This helps us cover our costs (e.g., web hosting). There are no additional costs or price disadvantages for you when purchasing.