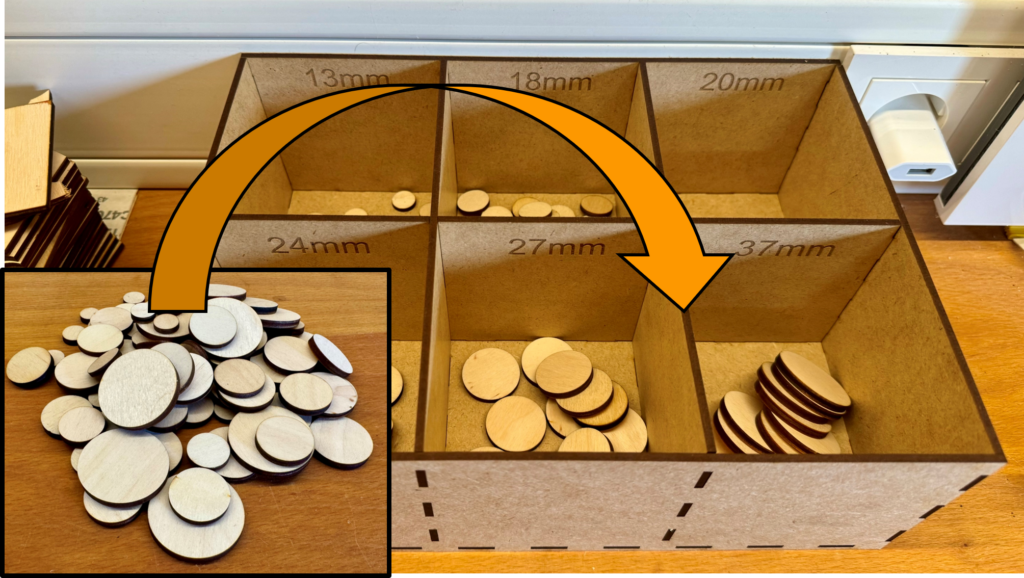
During my laser projects, I often end up with round pieces of the same sizes. I’m not sure yet what I’ll do with them, but I feel like they’ll come in handy someday. So, I want to store them, sorted by size, in a beautiful wooden box. In this article, I’ll show you how to design such a box with dividers using the free tool Boxes.py and laser cut it with Lightburn.
Materials Needed for the Lasercut Wooden Box
Boxes.py – A Brilliant Web Tool
Boxes.py is an online box generator that helps create small boxes in various shapes. It was developed by Florian Festi in Python and is available for free under the GPL v3+ license. Huge thanks for this fantastic tool!
In my collection of “round things,” I found six different sizes. To store them sorted, I chose the Type Tray template. My only condition: everything must fit on A4-sized material, as I already have MDF sheets in this size.
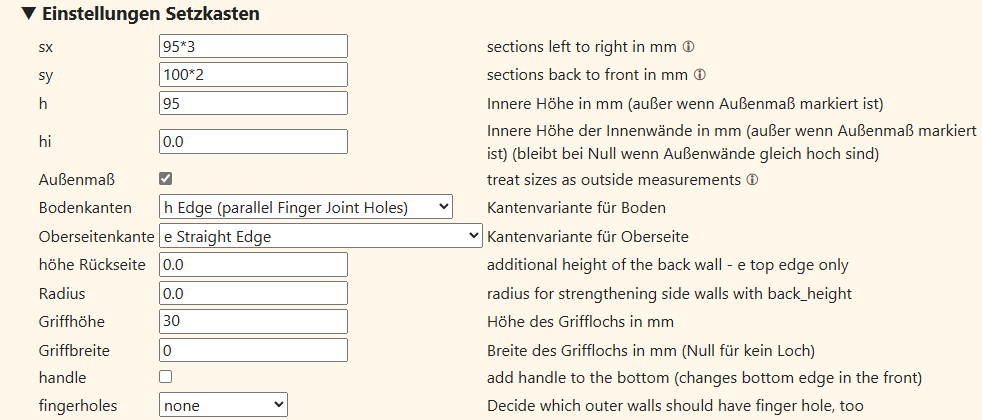
Box Settings in Boxes.py
For my six different round items, I need a 2×3 grid. Conveniently, A4 size has a similar format—specifically, 210x297mm. In the box settings, I selected 95×3 for the X-axis (sx) and 100×2 for the Y-axis (sy). This leaves a small margin, so I don’t need to be perfectly precise when positioning the material in the laser cutter.
For the height (h), I chose 95mm, so two long side panels and three short ones fit on a single MDF sheet. Since I don’t want a grip hole, I set the grip width to 0. The rest of the settings are left at default values.
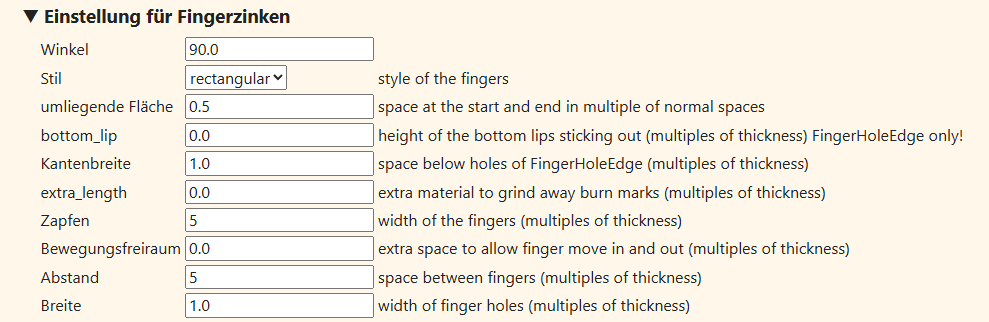
Finger Joint Settings in Boxes.py
The box could be ready to generate at this point, but the finger joints are too small and too numerous for my liking. This makes assembly fiddly. To fix this, I went into the Finger Joint Settings and increased the finger width and spacing from 1 to 5. This means the finger joints are five times the material thickness and have the same spacing. The remaining settings were left at default values.
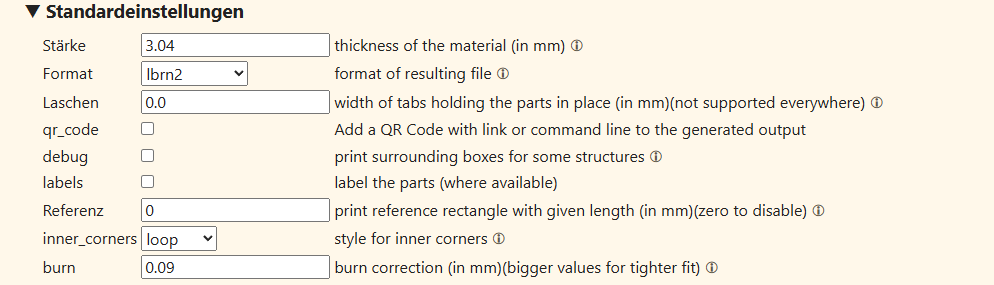
Material Settings in Boxes.py
Next comes the most critical part: material settings. These determine all the fit dimensions and whether the box fits perfectly or ends up in the trash. My material has an exact thickness of 3.04mm. Knowing my kerf, I set the burn parameter to 0.09. If you don’t know your kerf, you can stick with the default value of 0.1. A smaller value makes assembly easier as the parts won’t fit as tightly.
For the format, I selected lbrn2, as I’ll be working in Lightburn. If you’re using Inkscape, svg is the recommended format. Lastly, I unchecked labels and reference since I don’t need these markings.
Once all the settings were configured, a click on Generate produced a Lightburn file for download. What’s great about this tool is that you can save your settings in a URL and revisit them anytime. If you want to replicate my box, you can use this link: Type Tray – Boxes.py.
Laser Preparation in Lightburn
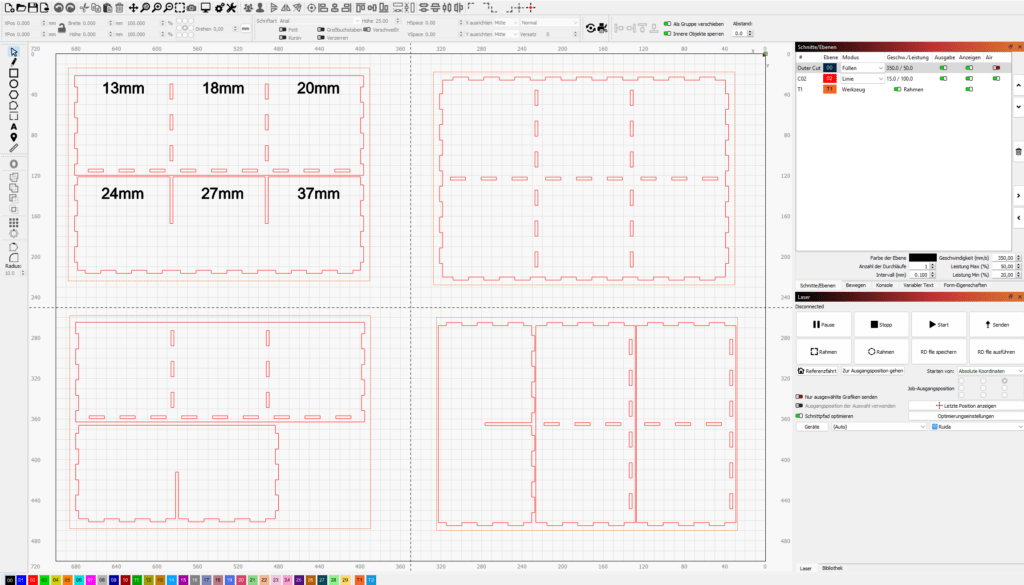
In Lightburn, I assigned all lines to the red layer “02” and set my MDF cutting parameters: 15mm/s at 100% power (equivalent to 16mA on a 60W CO2 laser tube). To label the compartments with the diameters of the “round things,” I added an engraving layer “00” and created the labels.
Next, I created four A4-sized frames on the “T1” tool layer (297x210mm). These frames helped me arrange the parts across the MDF sheets and later align the material precisely in the laser cutter. To cut, I filled each frame with as many parts as possible, placed the MDF in the laser, aligned it with the frame tool, and cut out the parts.


ADVERTISEMENT: The links marked with an asterisk (*) are affiliate links. If you click on such a link and make a purchase on the destination page, we receive a referral commission from the respective provider or online store. This helps us cover our costs (e.g., web hosting). There are no additional costs or price disadvantages for you when purchasing.