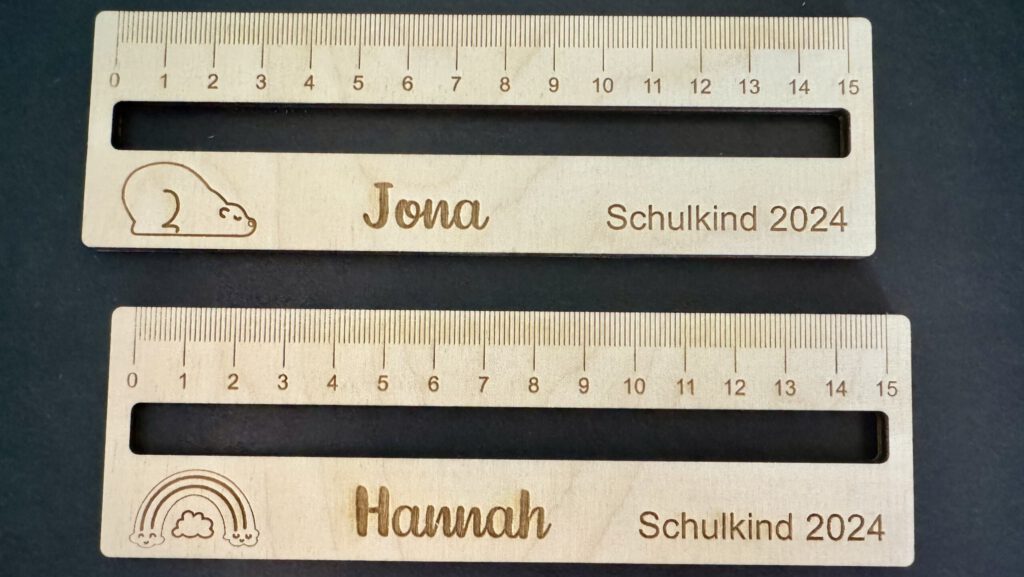
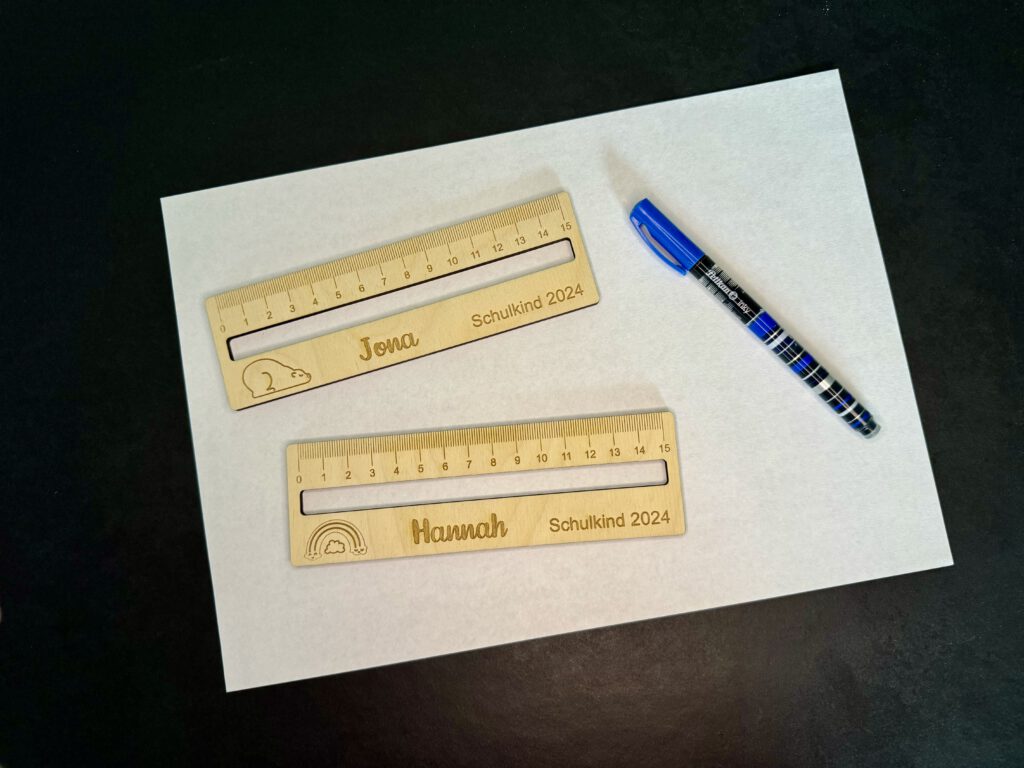
The enrollment to school is an exciting milestone in a child’s life. A personalized lasercut ruler makes for a practical and unique gift that can make the school start even more special. Instead of purchasing an expensive ruler from Etsy, you can easily create your own personalized ruler for free using a laser cutter. In this article, I’ll guide you step by step to design and craft a custom ruler—completely cost-free!
Materials
For this project, all you need is a small piece of plywood. With a bit of luck, you might find a suitable piece in your scrap box, making this project completely free! If not, I recommend using laser-friendly wood from Wood4Pros. Use the code “laser-crafting” to get 15% off your entire order.
Material List:
- Plywood (3mm-4mm) measuring 18cm x 10cm
Step 1: Design the Ruler in Inkscape
I usually create my designs in Lightburn, but for this project, I used Inkscape. Although I prefer Lightburn for its ease of use, Inkscape offers a particular advantage for this project: Path Effects.
Step 2: Using the Path Effect “Ruler” in Inkscape
Once you open Inkscape, start by drawing a horizontal line. Use the “Draw Bezier Curves and Straight Lines” tool from the left-hand toolbar. Click on a point in the workspace, hold down the CTRL key, and click on a second point to draw a perfectly straight horizontal line. Press Enter to finalize the line.
Set the line’s width to 150mm and its height (thickness) to 0.3mm in the top toolbar, as the ruler scale will span 15cm.

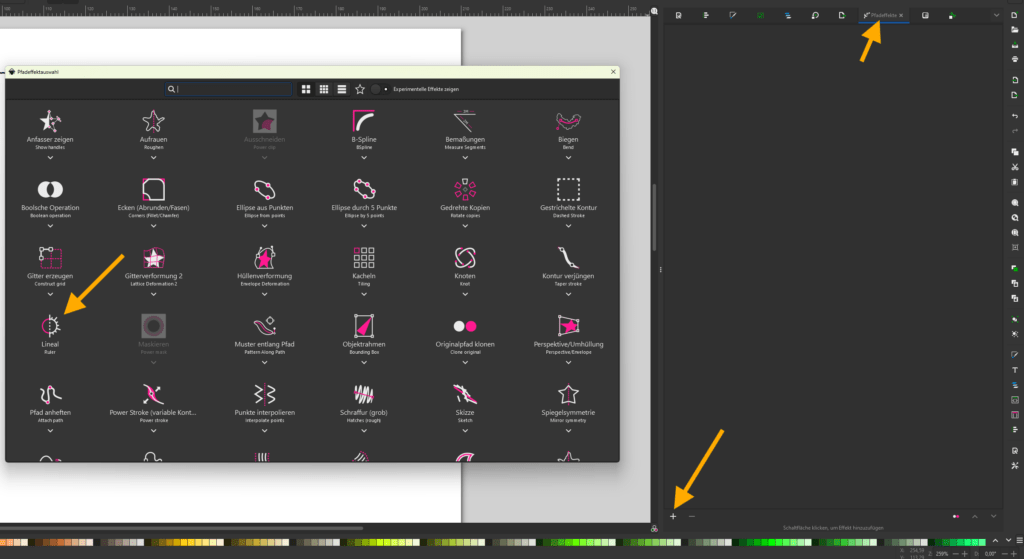
Next, select the line and navigate to Path → Path Effects in the top menu. A black command menu will appear on the right side. Click the + button and select the Ruler effect.
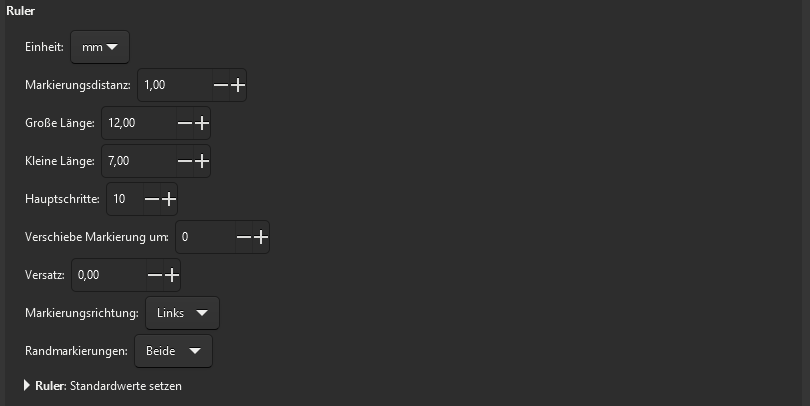
For the settings, choose mm as the unit and set the marker spacing to 1mm. This will create a tick mark every millimeter. Set the major tick spacing to 10mm for centimeter markers and adjust the lengths of the major and minor ticks to your liking. And voilà, your ruler scale is ready!
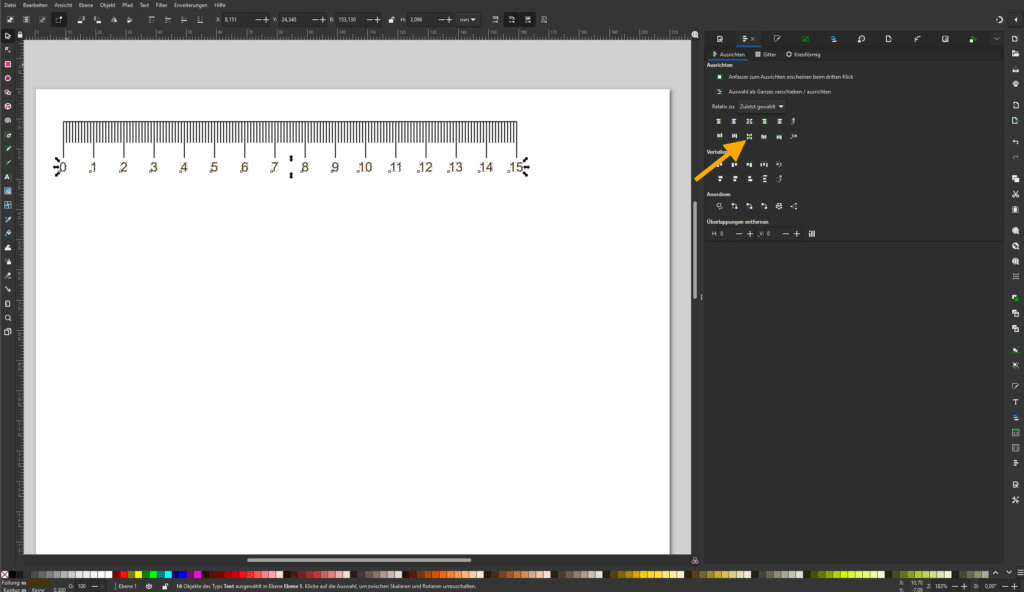
Step 3: Add and Align the Scale Numbers
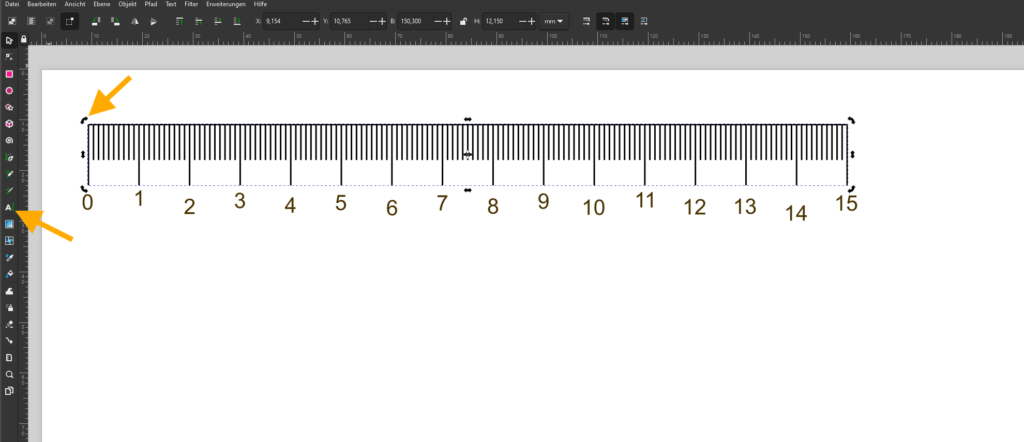
Now it’s time to add numbers to the scale. Since the numbers need to sit below the ticks, first rotate the scale upside down. Select the scale, click on it again, and use the rotation handles in the corners. Hold CTRL while rotating to keep the movement precise.
Next, use the Text Tool from the toolbar to add the numbers 0 to 15 in font size 12. Position each number below the corresponding tick mark.
To align the numbers perfectly, select all of them and use the Align and Distribute tool from the right-hand command menu. Choose Align Horizontally, and all the numbers will line up neatly.
Step 4: Create a Viewing Cutout
Using the “Create Rectangles and Squares” tool, draw a rectangle measuring 150mm x 10mm. Drag the small circle in the upper-right corner of the rectangle downward to round its corners slightly.
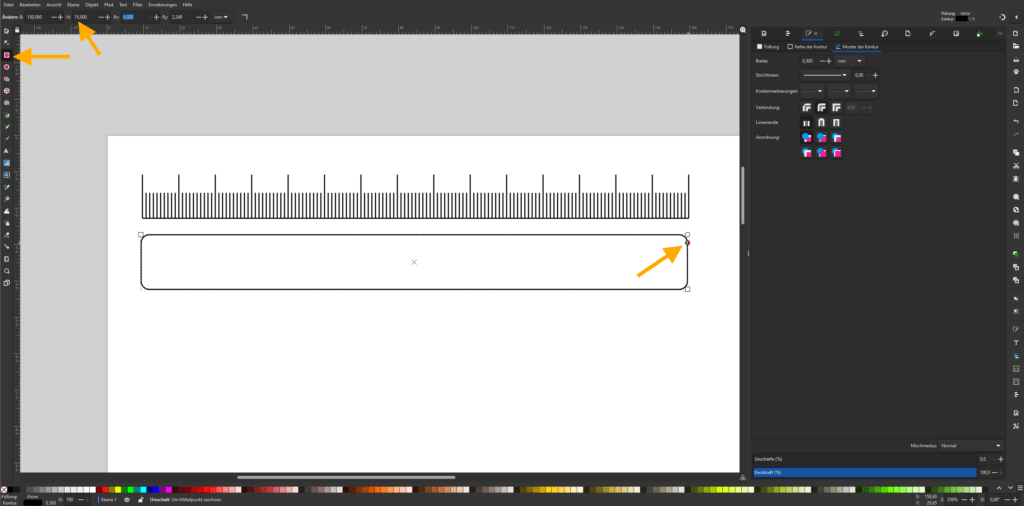
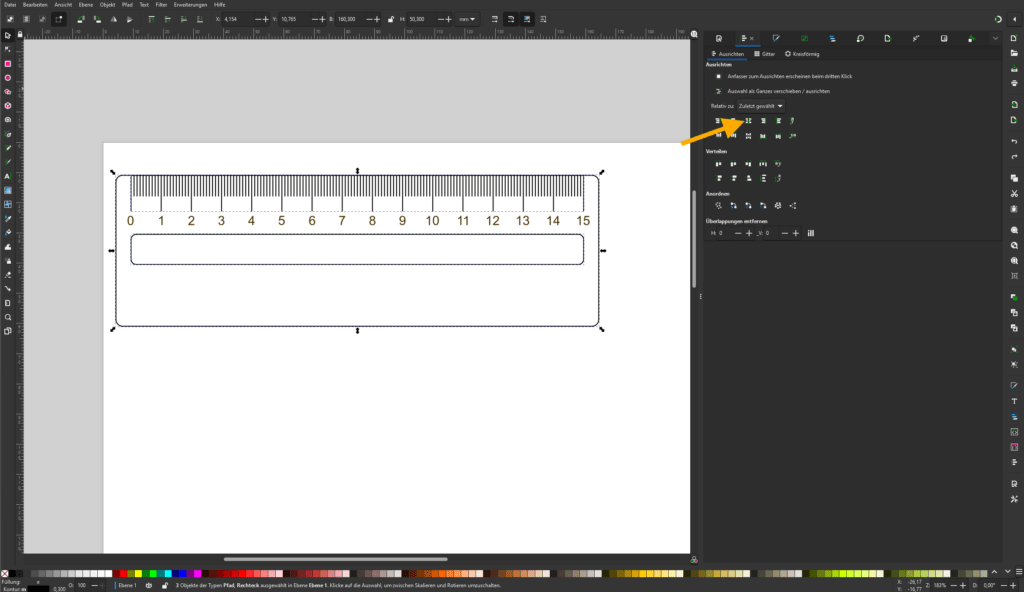
Now, draw a second rectangle measuring 160mm x 50mm to represent the overall size of the ruler. To align all elements (the ruler scale, viewing cutout, and overall size), select them and use the Align and Distribute tool again, this time choosing Align Vertically. You should now have a perfectly aligned ruler layout.
Decorate the Ruler
The basic ruler design is complete! You can now personalize it further by adding cute animal motifs or the child’s name using the Text Tool. If you’re looking for free fonts to make your design stand out, check out my guide on Lightburn Tutorial – Adding and Using New Fonts
Download the Free Template
As always, I’ve provided the free template for download:

